We're Military Spouses. We're Runners. We're Stroller Warriors.
  Stroller Warriors Running Club
  • Home
  • About Us
    • How it all began
    • How it all continues
    • Who we are
    • What we do
    • SW Testimonials
  • Chapters
    • How to join
    • Starting a Chapter
    • Coordinating an Existing Chapter
    • Coordinator lineage
  • Blog
    • Meet the Authors
  • Miles
    • 2020 Wall of Fame
    • Program History
    • RTW Chapter Videos
    • 2019 Wall of Fame
    • 2018 Wall of Fame
    • 2017 Wall of Fame
    • 2016 Wall of Fame
    • 2015 Wall of Fame
    • 2014 Wall of Fame
  • News
    • Videos
    • Awards
    • Photos
  • Gear
  • FAQ
  • Contact Us

Training During a PCS

6/25/2015

0 Comments

 
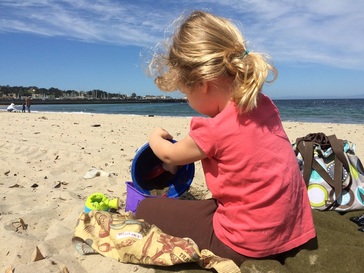
Picture Getting creative: needed to get in a run and one last beach trip, so we threw a few sand toys into the stroller.
You’re looking at the calendar, deciding what date to schedule the movers. All of a sudden you realize that training for your fall race should begin about the same time you will be traveling to a new duty station. You think, “How can I do it all?”

Many of us are aware that the 40th Marine Corps Marathon is coming up in October.  It’s a bucket list race for many runners.  Not only is the Marine Corps Marathon on our minds, but fall in general brings about many great races due to subsiding heat and beautiful foliage. Training for most is about to begin…and it is the peak of the PCS season.

Training during a PCS (Permanent Change of Station, or move), while a challenge, is not impossible. It will also not be perfect, and that is fine. These are just a few mental tricks I use to get through an exciting but challenging time.

Maintain before you train. The key to successfully training during a big life change is to plan ahead. Make sure you have a solid base prior to the training start.  Odds are a few planned runs will be missed during your move, so having the base to back your missed runs will keep detriment low.

Get creative. Run anywhere and any distance. Instead of missing a run completely, get in a couple of miles. Two miles is better than no miles. It’s perfectly fine to change planned run days around or adjust the mileage to make it work with pack days, truck days, hotel days, drive days, wine days, my-children-are-going-crazy days. 

Vent. You are leaving one place and moving to a new one. Anxiety, excitement, sadness, frustration are all whirling within you right now. Take this opportunity to have a few memory-lane runs in your soon-to-be old hood. Whatever emotion you feel about the move can process during your run. Run hard, cry, laugh, shout “hallelujah, I can’t wait to get out of here!”, or whatever is traveling through your mind. You may come back a little lighter and better able to handle some of the stress.

Picture
One last race with friends before moving.
PictureScenic runs don't always have to be by the ocean.
Explore. During your travels take advantage of the places you visit.  Have you ever seen those scenic run photos in magazines? Plan one of these beautiful runs for yourself or your family; it will create an unforgettable memory. Once you arrive to the new place, there is no better way to explore than by foot. (Map it out first and make sure the area is safe…Google is your obvious go-to friend for this, but the local running store would be a great start for insider info on ideal trails/paths).

Don’t stress. If you are a check-list person like myself, you probably look at your mileage log with nausea when you see so many blanks or the numbers are not where you hoped they would be. Go for a run, or have a beer and ignore it.  Either way, make a decision and move on. You have enough to stress about already. Once things settle, you can hit the ground running again (knee slapper, you’re welcome).

Don’t race (she said what?!?!?). This is a very valid option. If the timing is just plain poor, plan for a later race. You know yourself, your body, and whether the training is manageable for you and your family. There are ALWAYS more races. Missing too many planned runs can lead to big problems, and you may need to rethink the race altogether. Instead, sign up for a race a couple of months later. 

Share your ideas or tried-and-true methods for training through a time of transition. We'd love to hear them!

Happy moving!
Angel
0 Comments

DIY: Waterproof Race Day Drawstring Backpack

6/11/2015

0 Comments

 
by Kelly

Recently as I was preparing for a big race, I realized I didn't have a race bag to leave at the bag drop that met the following requirements: 1. Waterproof 2. Unique and easily identifiable and 3: Fit all of my stuff and 4. I wouldn't be horribly upset if it dissapeared. So, I decided to make one for myself that met all of my needs. I thought you might enjoy learning how to make your own race day backpack, so I've composed a tutorial for you. Please let me know if you have any questions. I am happy to help! I would also love to see your finished products, so feel free to post comments and photos below!

What you need:

40 inches x 16 inches waterproof outer fabric (you can also use regular fabric)
40 inches x 16 inches inner lining fabric
4 yards of rope cut into two 2 yard segments  (I ordered paracord online).
Picture
1.     Take your 40x15 water proof outer fabric and fold it so that right sides are together.
2.     5/8 of the way in from the side mark 1 in down and 2 in down from the top. Also mark 1 in up from the bottom. Do this for both sides. Pin.
Picture
3.     Sew from the top (back stitching at the top) to the first mark. Back stitch at the first mark. Stop sewing and move your foot to the second mark. Back stitch. Sew all of the way down until the last mark. Back stitch. Repeat for other side. ***I recommend using a walking foot if you are working with waterproof fabric.
4.     Take your 40x15 inner lining fabric and fold it so right sides are together. Mark 4 inches on one side. Pin to keep from moving. 
Picture
Sew all of the way down one side (backstitching at the top and the bottom). Next you will work on the side where you marked 4 inches off. Sew from the top of the fabric to your mark. Back stitch. Jump the 4 inches. Backstitch at the bottom of your 4 inch mark and sew to the bottom of your fabric, back stitch at the bottom.
5.     Iron seams open on your inner fabric, and outer fabric
6.     Turn outer fabric so the right side is facing out. Put it into the inner fabric (which is still wrong side facing out)
7.     Line up and pin seams.
8.     Sew all of the way around the top edge using a 5/8 seam allowance. 
9.     Using the 4 inch opening you left on the side of the inner fabric turn the fabric right side out.
10. Next match up the corners and iron around the top of the bag.
11. Now you are going to sew two lines to make the casing. The casing is what the  rope will go through.  Sew around the fabric (so starting and ending at the same point) from where the top of the hole and from the bottom of the hole. If you are using a waterproof fabric you will want to use a walking foot for this part if you have one.
12. Take one piece of the rope, attach the end to a pin and pull it through the casing to the other side, then keep going and exit out of the same hole you started at.
Picture
13. Take the second piece of the rope, starting at the other end of the casing, attach the end of the rope to a pin and pull it through the casing to the other side, then keep going and exit out of the same hole you started at.
Picture
14.  Pin two ends of the rope (from the same side) together. Put them through the hole of the outer layer, which is located at the bottom of the side. Pin in place.
Picture
15. Pull the section you just put the rope through out of the hole you left in the inner lining fabric
Picture
16. Continue the seam and sew over the ropes to close off the hole and secure ropes in place. Go back and forth over the ropes a few times to make sure they stay secure.
Picture
17. Repeat steps 14-16 for the other side.
18. Sew the hole in the inner lining closed. You can sew it closed by hand using a blind stitch or you can sew it closed on a machine. The choice is up to you!
Picture
19. Relax and enjoy your new race bag! 
Picture
Picture
Picture
0 Comments
    Meet the Authors

    Categories

    All
    DIY
    Founding Stories
    Gifts For Runners
    Inspiration
    Member Spotlight
    Running Tips
    Shoes
    Stroller Warriors By The Numbers
    Trail Running
    Treadmill Running

    Archives

    February 2021
    January 2021
    December 2020
    October 2020
    September 2020
    August 2020
    June 2020
    May 2020
    April 2020
    March 2020
    February 2020
    January 2020
    December 2019
    November 2019
    October 2019
    August 2019
    June 2019
    May 2019
    April 2019
    March 2019
    February 2019
    January 2019
    December 2018
    November 2018
    October 2018
    September 2018
    August 2018
    July 2018
    June 2018
    May 2018
    April 2018
    March 2018
    February 2018
    January 2018
    December 2017
    November 2017
    October 2017
    September 2017
    August 2017
    July 2017
    June 2017
    May 2017
    April 2017
    March 2017
    February 2017
    January 2017
    December 2016
    October 2016
    September 2016
    August 2016
    July 2016
    June 2016
    May 2016
    April 2016
    March 2016
    February 2016
    January 2016
    December 2015
    November 2015
    October 2015
    September 2015
    August 2015
    July 2015
    June 2015
    May 2015
    April 2015

    RSS Feed

    Miles>>
Proudly created by Stroller Warriors®, a Registered Trademark