We're Military Spouses. We're Runners. We're Stroller Warriors.
  Stroller Warriors Running Club
  • Home
  • About Us
    • How it all began
    • How it all continues
    • Who we are
    • What we do
    • SW Testimonials
  • Chapters
    • How to join
    • Starting a Chapter
    • Coordinating an Existing Chapter
    • Coordinator lineage
  • Blog
    • Meet the Authors
  • Miles
    • Program History
    • RTW Chapter Videos
    • 2023 Wall of Fame
    • 2022 Wall of Fame
    • 2021 Wall of Fame
    • 2020 Wall of Fame
    • 2019 Wall of Fame
    • 2018 Wall of Fame
    • 2017 Wall of Fame
    • 2016 Wall of Fame
    • 2015 Wall of Fame
    • 2014 Wall of Fame
  • News
    • Videos
    • Awards
    • Photos
  • Gear
  • FAQ
  • Contact Us

Learning to Fight Back

2/24/2022

0 Comments

 
Picture
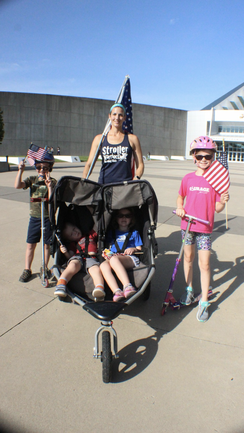
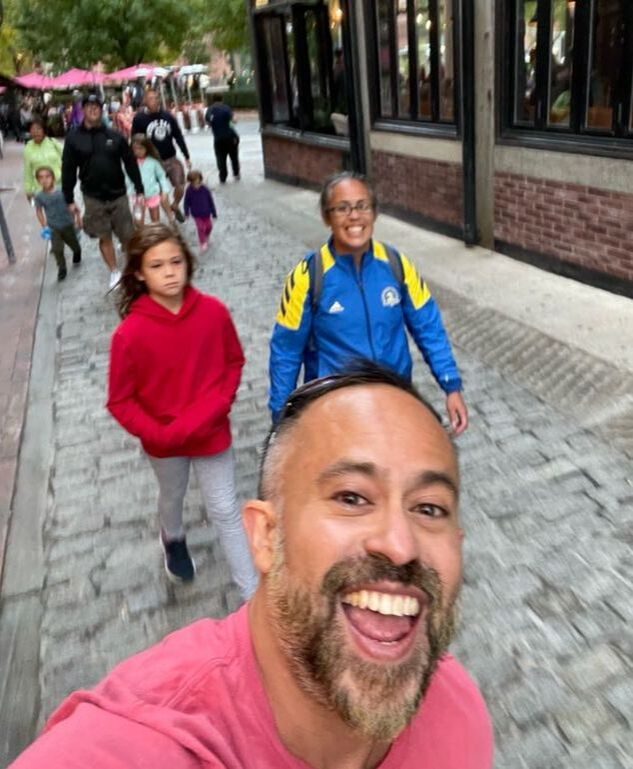
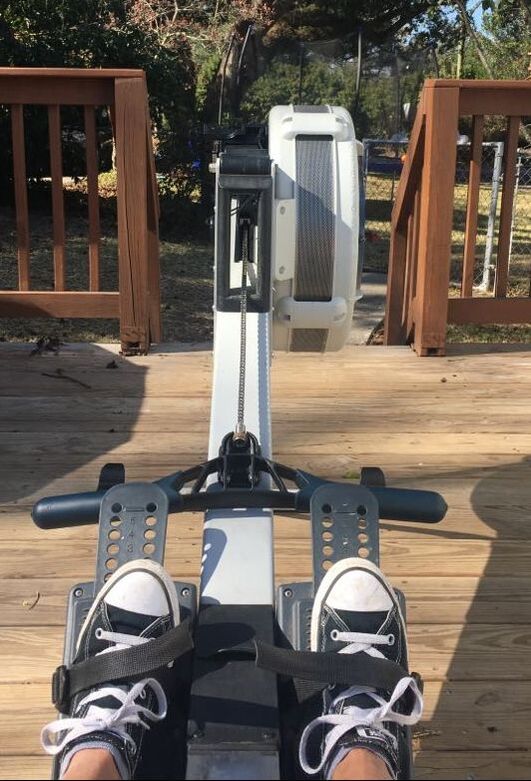
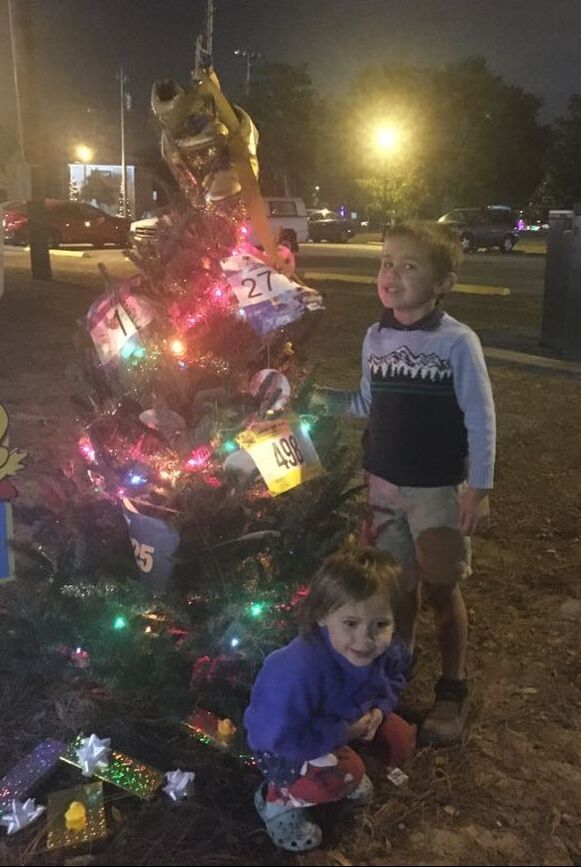
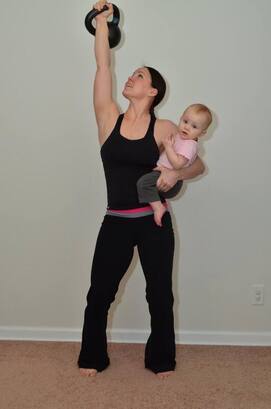
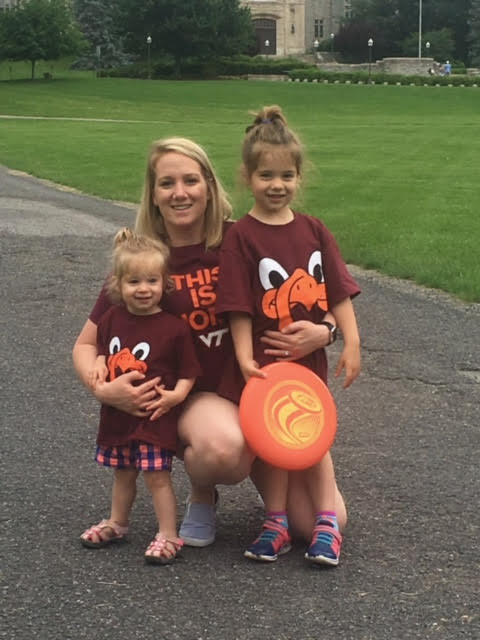
Me and my kids, in the thick of our stroller running days.
As a female runner, I hardly feel safe when running alone. There’s a little voice in the back of my head, telling me the horror stories of female runners before me. A little voice reminding me of the times I’ve been stalked, touched (I’ve had bikers assault me on a rec path) and yes, even the times I’ve had others try to abduct me while I was running. When I started running with a stroller I felt a little safer. Children in a stroller complicate things for a would be-rapist or attacker. The lone stroller would attract a lot of attention and there’d be more unknown variables with screaming kids around. My stroller was like a safety blanket and we ran everywhere, freely.

​Well, I’ve been a Stroller Warrior for 12 years now. My children are getting older and while they’re not out of the stroller entirely yet, I’ve had a lot more stroller free runs while they’re in school. I’ve begun to feel the need to learn to protect myself. What if I was attacked on a run? Would I know what to do? Would I be able to get away? I’m the kind of person who thinks of a “plan” in the event of x,y,z and if I ever was rushed and someone tried to attack me, my plan was to step wide to make a wide, firm base, and hope that they got thrown off track and I stayed stable so I could run away. That was the entirety of my plan. I had no idea what to do when/if we actually hit the ground together. Or even if we were face to face, with an attack imminent.

Picture
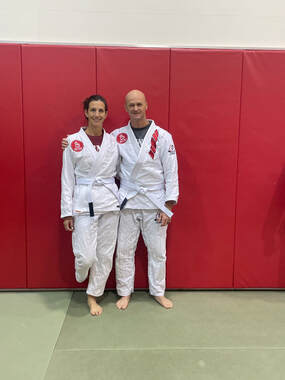
My husband and I signed up together, and had our first day together!
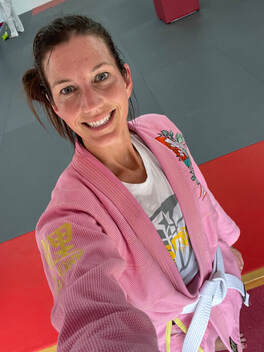
In preparation for a return to the States after living in Okinawa, Japan (maybe the safest place on earth? Certainly dubbed the “happiest” by most of the world!), I wanted to learn some self defense. Long ago I picked Brazilian Jiu Jitsu for my kids to do as a sport. After working for the National Center for Missing & Exploited Children, I wanted my kids to have the ability to defend themselves. I liked that Jiu Jitsu gave them muscle memory and hands-on experiences. I knew from researching that 90% of fights ended up on the ground and if you could gain or maintain ground control, you had a MUCH better chance of winning; of living. I had watched my children for years but never took any classes myself. In preparation for stroller-less running, I signed up.

Picture
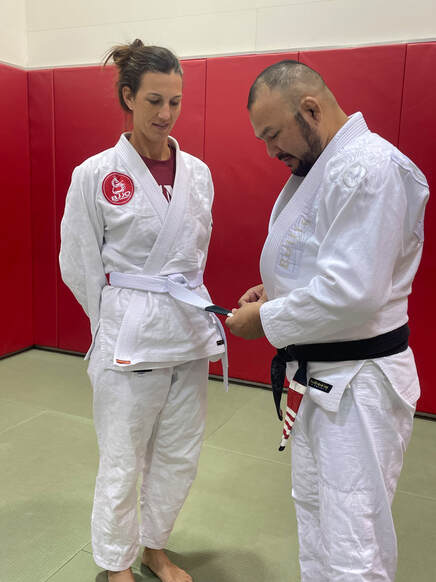
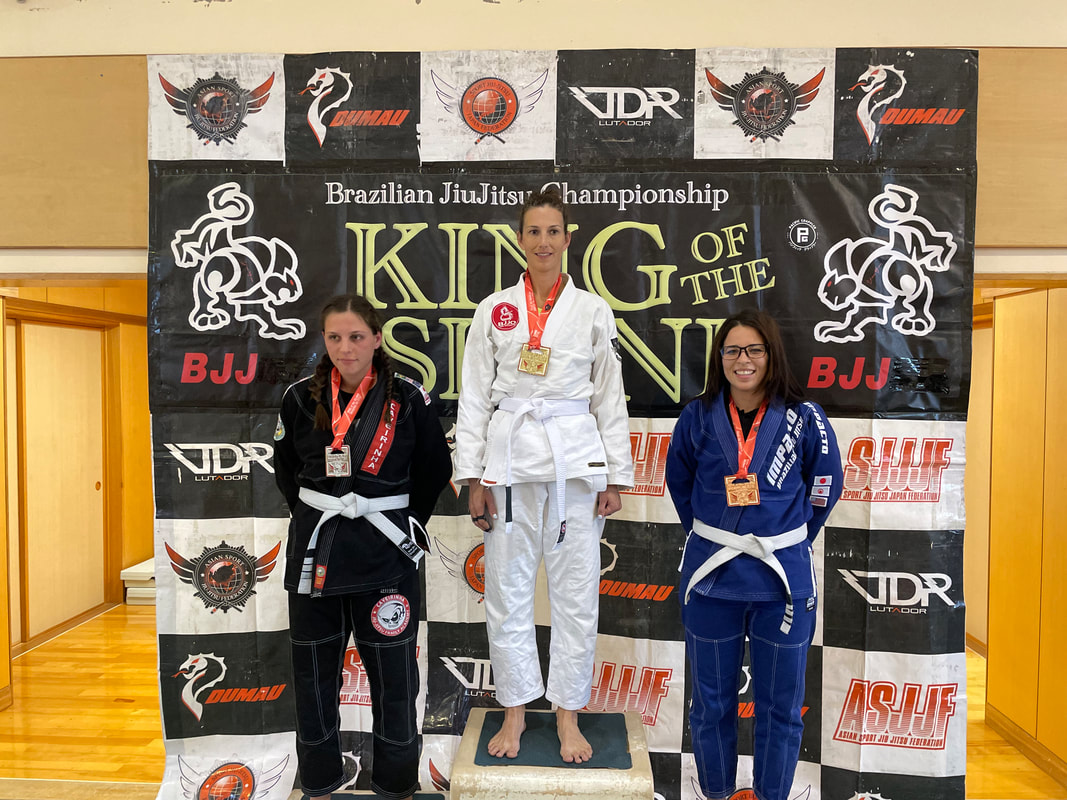
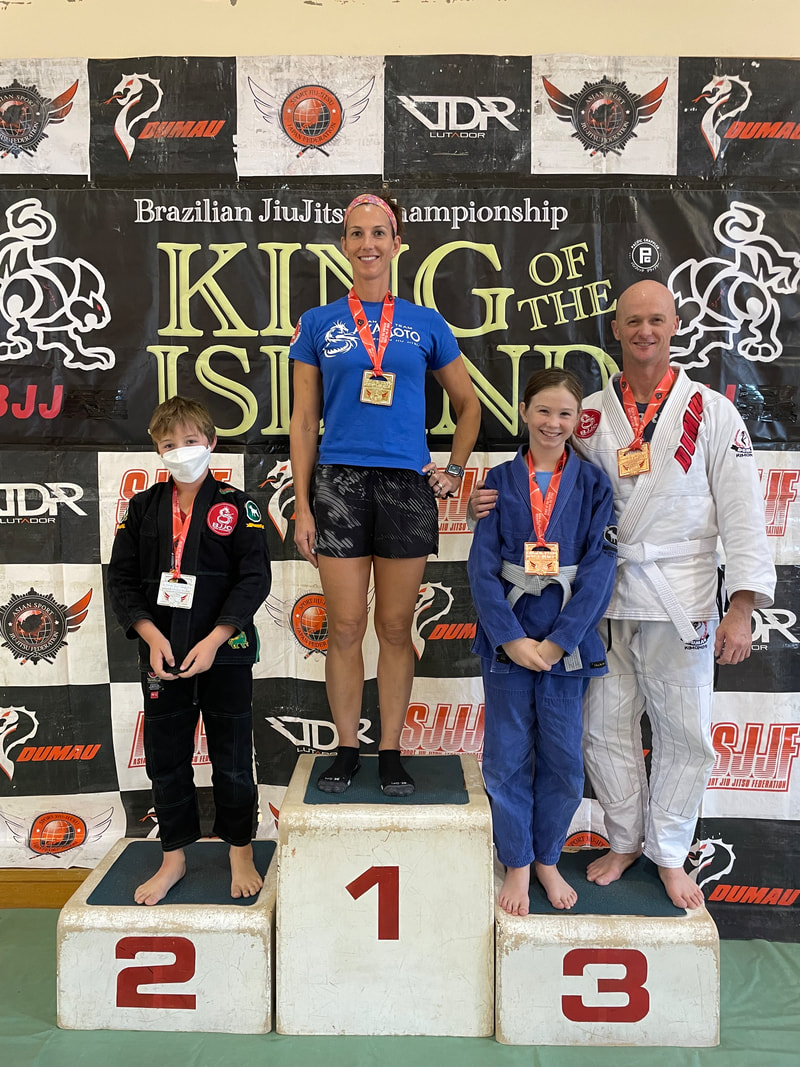
​So, at 38 years-old, I entered the matted room on base and walked into an entirely new world. I’ve been training for 8 months now and have one stripe on my white belt. I’ve completed in one tournament and took home Gold, beating out two other competitors. I have learned to fight from the ground, on my back. I have learned to choke someone out with my legs (it’s called a triangle choke). Who knew you could choke with your legs?! I primarily “roll,” aka fight, male marines and I’ve learned that I’m so much stronger than I give myself credit for. My running has been an incredible asset to me, which I particularly noticed in the tournament. When I am training BJJ, I didn’t tailor my running at all. I figured if I’m going to get attacked, I’d most likely get attacked on a run. So learning to fight while tired was a goal of mine. So on Saturdays I’d do my long run at 5am, generally around 12 miles, and then go to open mat where I’d spar for 2 hours. When competition day came, my stamina was incredible. I was hardly tired while my competitor looks clearly gassed.

Picture
BJJ hasn’t been all rainbows and sunshine. I’ve injured my ribs, and continually have bruises. But in the past 8 months I also have been injured just walking down the steps! (My socks slipped). To me, an injury while learning is part of the game and I’m not afraid of it. Nothing worth fighting for is ever going to come easy, and I have a lot more to learn.

​​I’ve grown in confidence and am learning not only how to choke but how to protect from a choke. Sparing/defending yourself ignites something primal and I am learning how to breathe through that and regain my mental focus in a fight. My friend Anne and fellow runner who is blue belt in BJJ said, “my goal if attacked is always to be a big enough pain that they’ll decide I’m not worth it and go away.”


Before BJJ, had I been attacked, I think once we hit the ground I probably would have tried to talk to them, to play nice and get them to realize I’m a human, a mom. Now, I know when we hit the ground that’s when the fun really begins and I’m not stopping until you run away, I can run away or you passed out from me choking you.


If you’ve ever felt scared for your safety on a run. Consider taking some martial arts or self dense classes. There are a variety of options to choose from and all of them will help your knowledge and confidence grow.


Happy Running!
Kelly


0 Comments

Why I Cross-train: Run Better by Training Smarter

2/10/2022

0 Comments

 
In 2010, when training for my first Boston Marathon, I stuck to every prescribed mile on my training plan— I ran through small injuries, bronchitis, fatigue, and all during a bitingly frigid and snowy Boston winter.  Race day was naturally exhilarating, and my mind was thrilled, but my body was not— it was tired, beat-up, and sick of running!  The race went well, but I knew my training would need to change for enhanced performance in the future.  Soon thereafter, I began functional fitness training and continued running often, but not quite as much as before.  As my fitness diversity increased, my running times decreased!  I learned to combine a mixture of workouts ranging from short-duration heavier-weight workouts, to longer metabolic conditioning sessions through other domains such as rowing, or 100+ burpee box jumps.  This naturally strengthened my legs and arms, but most importantly it built a stronger-core— no longer would my back feel strained on long runs, nor my quads cramp at 20+ miles on hilly terrain!  Best of all, it made running more exciting as I craved some miles on road/trail more after not doing it daily!  I specifically remember the excitement of running alongside the roaring Missouri River Trail in Montana while stationed at Malmstrom AFB—running was fresh, I felt refreshed, and I was hungry to get at it!   

This is cross-training.  Cross-training employs various exercises to improve one’s performance in a particular sport— in this case, running.  Cross-training is versatile and can be completed through many different methods— rowing, biking, swimming, strength training, yoga, or even through your favorite sports (soccer and volleyball for instance).  For me, functional fitness training was my major introduction to effective cross-training.  By implementing a multi-domain approach primarily focused on weights, gymnastics, and weightlifting, functional fitness provided me a cross-training experience that improved my running capabilities.

This is what I’ve learned in the past 12 years after adopting cross-training into my running routine and learning that I can run better by training smarter:

1). Cross-training conditions your body to run better by strengthening auxiliary muscle groups not trained while running, while giving your primary running muscle groups a much-needed rest.  Like a car, if you never rotate the tires, you’ll get a flat!  As runners, we also must “rotate” our routines.  Cross-training incorporates many different elements of fitness that activate all muscle groups…this improves endurance while avoiding injury and muscle loss through a diversified use of all muscle groups. 
​
2). Cross-training helps athletes maintain their fitness level when overcoming a running injury.  After running the 2012 Boston Marathon, I injured my hip through overuse as it was compensating for a post-partum core in need of strengthening.  My physical therapist recommended I break from running for three months and CrossFit instead.  Through some great coaching at Big Sky CrossFit in Great Falls, MT, I increased my overall endurance/stamina through other multifunctional domains.  After my physical therapist cleared me to run again, I noticed an immediate change— I felt stronger and more agile.  

Picture
Action shot of my first CrossFit session at Big Sky CrossFit in 2012.
​3). Cross-training is a form of active recovery.  What is active recovery?  Active recovery is low-intensity exercise after a long, vigorous run, or workout.  Think of how your legs and body feel after a big race or long training run— shattered, as stiff as a board, feet are achy, and you just want to sit for days!  This is when active recovery is useful— helping your muscles and joints recuperate by staying loose.  A family walk, an easy hike through the woods, an enjoyable bike ride, a slow rhythmic pull on the rowing machine— this is a small list of my favorite cross-training activities that I use for active recovery.  
Picture
Getting in some active recovery with the family while walking home to Charlestown from downtown Boston after the 2021 Boston Marathon.
​4). Cross-training offers a change of pace from my usual running schedule, which bolsters my long-term love for running.  Sometimes I just need a change of pace up from my every day running routine with the stroller and the dog, or running on the flat roads in Charleston.  Enter the rowing machine— instead of running my scheduled 45-minute run, I will put on a soundtrack and row for the same duration I’d normally run (my kids ALWAYS choose “The Greatest Show Man” or “Hamilton” soundtrack).  Sometimes I add a bit of strength training to the end of a row— a double TABATA of front squats and pushups!
Picture
Completing a slow row outside!
​Run Better by Training Smarter.  Find what works for you, work it into your routine, and enjoy the results.  Be it weightlifting or a hike, get out there, vary your fitness, train smart!

Happy Running!
​-Rose :)
0 Comments

Running and Fitness over the Holidays

12/23/2021

0 Comments

 
Winter break is upon us— holiday travel is happening, kids are on school vacation, visitors are coming from out of town.  Lots of wheels are turning, but I still make it a point to prioritize fitness.  How can we make fitness happen over the holidays?  Here are some examples on how to integrate your fitness schedule into holiday craziness…
​
1). Include your children in your fitness routine.  This is something that Stroller Warriors do so well!  Throughout the school year, many of us have older children at school during the day.  As for me, many of my runs and workouts include my youngest in the jogging stroller (and our dog) right after I drop off my older kids at school.  During holiday break, I am shifting gears to ensure that I get in my daily fitness with my older two children home from school— planning running routes that are scooter and rollerblade friendly, adding a park pit-stop midway when I decide to do a longer run, opting for a shorter run to a local coffee shop and a walk home through the town square (the Christmas decorations in our town are lovely).  
Picture
Mid walk to see the decorated trees in the town square after a short run and a trip to the coffee shop!
2). Coordinate a solo run.  Even on non-school vacation days, it is splendid to have 30 solo minutes running.  I will coordinate with my husband’s work schedule to run before or after work.  In the past, I coordinated with my fellow Stroller Warrior friends— half of us would run, while the other half would watch the children at the park.  This is a wonderful time to lean on your Stroller Warriors community!

3). Diversify your strength training.  Strength training does not have to happen in a gym setting— it can happen anywhere!  As I was in the middle of cooking dinner a few days ago, I set my workout timer on the EMOM function (every minute on the minute) and for every minute for 60 minutes completed 10 air squats.  This past weekend while doing yard work, I pulled my barbell out from the shed and completed 8 rounds of 5 heavy deadlift in between shoveling leaves into giant paper bags.
 
4). Make hotel workouts quick.  I am not a fan of running endless miles on a hotel treadmill.  Create a workout that keeps you engaged.  Here are a few examples:
​
              - 1 minute intervals on the treadmill for 20 minutes (1 minute fast, 1 minute decreased speed)
              - 4 rounds of a 400 meter run at an incline with 25 sit ups between each run. 
              - 10 rounds of 10 jumping lunges, 10 push ups

It is a festive time of year, so remember to keep running and fitness enjoyable and merry!

Happy Running!
-Rose 

0 Comments

Let's Plank Away!

11/4/2021

0 Comments

 
Planks are Great! BUT do you know why planks are a brilliant strength exercise? Or the massive impact a well-executed plank can have on running form? When done efficiently, planks are a serious bang for your buck exercise— obliques are on, deep core engaged, pelvis positioned to bring hamstrings to the party, and breath work in this position can be beneficial.  Not to mention the added bonuses that come with the endless options of plank progressions and variations.  However, none of this is possible if the traditional plank is not solid. 
​
Have you ever performed a plank and wondered why you cannot feel the work in your abdominals, but in other areas?  This is your body shouting that your plank is not in the optimal position.  The core cannot work as intended if your ribs are stuck forward.  It is common for the low back muscles, hip flexors, quads or even calf muscles to activate and try to assist for what the obliques are not able to do. Incorporating strength training exercises that help facilitate the optimal positioning of a plank is a great way to create a change in the core stability that will carry over into running.      
​
Our obliques play a significant role in running—​ helping rotation and managing core pressure and breathing.  The obliques aid with these functions by allowing one side of the rib cage to go forward while the other stays back— one side expands while the other side compresses to load or unload each foot.  For these oblique functions to go smoothly during gate, the ribs must allow for expansion and compression.   The obliques simply will not have leverage to do their job if the ribs are stuck forward or if the necessary areas do not compress or expand.
​
Let’s break down what should be “on” during a plank— working from the outside and meeting in the middle:

1). Head and Neck should be in slight extension with gaze slightly beyond fingertips.  This helps to keep the sternum long and encourages full breaths.  When tucking the chin and looking towards the toes, the sternum with scrunch and the position of the diaphragm and pelvis with change, therefore impacting the breath.
2). Hands should be pushing the ground away.  This helps facilitate shoulder blade protraction and engage serratus anterior muscle, which is what makes breath work in this position incredibly efficient.  The goal is to allow full expansion of the back with inhales.  Elbows should be soft and facing forward, not locked out to brace the upper body.
3).  Knees should not be locked out.  Locking out the knees will not allow the hamstrings to help position the pelvis correctly.  The goal is for the hamstrings to work with the abdominals to set the pelvis in a neutral position.

Think of your pelvis as a bowl of soup— the goal is maintaining the neutral pelvis, or not spilling the soup. It can be very tempting to squeeze glutes to maintain a neutral pelvis, but the goal is train hamstrings and abdominals to work together. The core will be ready to work when the pelvis is in a neutral position and the hamstrings are working in balance with the abdominals!
​
Picture
Picture
*************************************************
Molly O. has been a member of Stroller Warriors® since 2015 beginning with SW Ramstein where she volunteered as a Workout Leader and a Chapter Coordinator.   Currently, she is a member of SW Elsewhere.  Molly has worked as a Physical Therapist Assistant for 8 years and 5 years as a Certified Personal Trainer.  

Thank you Molly for contributing your knowledge and experience to strengthen the Stroller Warriors community! 
0 Comments

Kettlebell Squats with Sara

10/7/2021

0 Comments

 
Picture
The final piece of our Five to Thrive Kettlebell Series is legs! We’re going to hit them with squats and deadlifts! Both of which have just as many variations as all our other exercises in the series. You know by now I absolutely encourage you to use your imagination, there’s no wrong way to use a kettlebell other than without clear intention. You also get that I absolutely feel kettlebells are a tool for play, learning, and discovery. What that looks like and develops into is as individual and unique as each of us! So far, we’ve covered: swings, cleans & presses, and get-ups. But let’s pause for a moment and consider the over-arching theme in the series: the neurology behind movement. 
 
Neurology, neuroplasticity, neuro-centric movement is really starting to take off and become trendy. But also, it may be that any term with the prefix “neuro” in it can be a bit scary or off-putting for you, which I can respect and appreciate. My hope and intention of this whole kettle bell series is that, coming to Stroller Warriors as a runner-- you’re starting to shift from thinking about training as a chore, accessory, or checklist item-- to a much broader and inclusive form of neural expansion. That expansion happens with the kettlebell, which is just a tool- a tool for play. In its essence and innocence, there’s no wrong or right way to play! Consider neural expansion, or “neuroplasticity,” as synonymous to play. That’s not so scary after-all. 
 
Let’s check out some fun ways to play with leg-driven exercises with our kettlebell. Remember we have the squat and deadlift. We can think of squatting as anything where we’re holding a load ON the upper body (with the exception of the good morning). You may have heard of front squats, back squats, goblet squats, overhead squats, split squats, and even compass lunges (where you’re stepping out at various angles as if you’re in the center of a compass).  All of these variations can be done as uni-lateral (with one weight on one side) and bi-lateral (a weight in each hand). This is where the element of play can make kettlebell training anything you make it! 
 
The other leg-centric skill/drill is deadlifting. I love deadlifting! It’s so elemental to being human: lift a dead weight from the ground. The definition is in the name. I love when things are as simple as that! Deadlifting comes in as many sorts and forms as squatting. (There’s that theme of play I keep coming back to!) I think you can be more gracious with your deadlifting application right away than most other kettlebell exercises because I know you’re already doing them IRL (in real life) as a parent and caregiver! Especially when it comes to adding in rotations. Rotations? In a loaded workout? Absolutely! When we think of lifting, the first images that come to mind are barbell squats, bices curls, sit-ups…these moves are done in the front-to-back (frontal) plane. But, when you are creating space in the joints as a precursor to your training, rotations are safe, effective, doable, and add a new element of variety! 
 
How many times have you picked up a limp toddler from the floor or out of their car seat, rotated, and placed them ever so carefully into a stroller or carried them to bed? That’s a hybrid move! You’re squatting, lunging, rotating, AND deadlifting! You’re already doing these things. Intentionally playing around with them in your kettlebell sessions gives your nervous system more successful reps under controlled conditions. When they surface unexpectedly outside of your workout, your brain goes: “oh, this is familiar. I have the wiring for this. I got you.” And you just do it. Because you’ve practiced it, you’ve felt good doing it, you can own it! No injury. No problem. No worries. 
 
If you’ve done barbell or dumbbell squats and deadlifts, you might find kettlebells to be more fun simply through the design of the bell. Its liveliness compared to the rigidity of the aforementioned comes from the center of gravity being in the center of the bell, as opposed to displaced on either side like in the barbell and dumbbell. Simply put, you have more options with the kettlebell. Personally, in the long run, I’ve felt there’s more control in using a kettlebell for more traditional lifts. 
 
We can’t leave the article without mapping a place to start squatting your kettlebell. We’ll put them together with deadlifts in a quick workout after we’ve looked at the basic “how-tos,” in a follow-up piece.
 
Here’s your template for the front squat:
 
For the front squat, you have to get the bell onto the front of your body, up into the rack. If you review the clean and press piece in this series, or have already been putting it into practice, then you know how to clean the bell up into the rack. If not, no problem! We can use two hands to help cheat-curl the bell up into the rack position. The rack is just the term for holding your bell by the handle, with the ball on the outside of your forearm. That forearm is directly in front of your biceps on the same side. Hold the weight low in the rack, let your traps stretch and sink your shoulder down. Think of supporting the load it with your core/torso. If you try to muscle the bell into place and hang on only using your hand and arm, you’ll fatigue quickly. We want to be able to hold a relatively heavy load, since your legs are really very strong. We don’t want to over-burden the low back, neck, and arm. 
 
I mentioned using two hands to cheat-curl the bell into the rack. Here’s how to do that:
- Start with your bell on the ground (away from living things and pricey flooring).
- Hinge at the hips like you would for your swing (hips go BACK FIRST). 
- Then slightly bend at your knees so you can reach your hands to the weight.
- Let’s use the right hand to rack to the right side.
- Hook grip over the top of your handle with your right hand.
- Use your left hand to come behind and to the back side of the handle
(It should look like you’re holding your own hand, with the right hand on the bell and your left hand over the top of your right hand).
- Push your heels into the ground and start pulling the bell upward, like you’re zipping up a really long coat, meaning the bell stays close and snug to your body without hitting it.
- The left hand helps to pull AND keep the load close, and then direct the bell into the ‘V’ of your forearm and biceps. 
- NO BENT WRISTS-- The forearm is an extension of the wrist: “There are no wrists in kettlebells.”
 
There you have it. The bell is racked and we’re ready to squat!
 
I will tell you right now, that with the load on the front of your body, you will feel it trying to pull you forward and down. Fight it with your whole core: brace your abs, stay tall through your back, pull up through your pelvic floor.
 
Breathing is also paramount in squatting as well as deadlifting. You must sniff in to create intra-abdominal pressure from the INSIDE of your core as well. This makes for a strong back, core, and squat. It’s like giving yourself your own personal weight belt to protect your spine! That’s an important and valuable skill. And you can learn it with practicing front squats. 
 
- We have the bell racked.
- We have the core braced, to include the breath.
- Now let’s squat!
 
Don’t collapse like an accordion as you squat! Keep a long spine. Keep your head tall. Your eyes can be fixed straight, or slightly down as you squat down. Eye reflexes work like that: if you look down, your body wants to reflexively go down by firing flexor muscles. Just be careful not to also flex your head neck and spine. Eye tracking is a nuance that can enhance your lifting- IF you can tolerate it. If it’s too confusing, look on the floor in front & center of you-- about as tall as you are. That’s a good rule of thumb for stability. 
 
I like to think about bone rhythms as I squat. Sounds fancy. It’s just taking into consideration what’s happening at your joints, to move your bones. Muscles are attached to bones. So shifting focus from muscle to bones or joints might help you feel as comfortable with squatting as it did me. Let’s just look at the hip joint for now. 
 
When you squat down, the hip, being a ball in socket joint, will roll back and down. Of course, in the beginning of your squat training journey, we want to focus on keeping your knees behind your toes. I like to think that my shins stay vertical, as if they are in snow-skiing boots with a very slight shift forward of the shins. You really must have the ankle mobility, and core strength to go deep into a front squat. You can play with depths and load as you progress. But I recommend that you stop your front squat just before your thighs are parallel to the floor. “Why not parallel?” you may be thinking. That’s a common axiom. But the pressure on the knee in a beginner is best kept slightly above, or slightly below parallel. As you get stronger, more mobile, and comfortable in front squatting a kettlebell, you can play with depths. 
 
Once you’re in the bottom of your squat, (some refer to it as “the hole”), we reverse to standing. Simple enough because squatting is primitive. If you need to breathe here, take another quick sniff in to keep the pressure in your core. And, just as the hip rolls down and back as you descend into the hole, it will roll up and forward as you stand.  Bone rhythms can really help simplify your lifting! That’s exactly why I like them. There are a lot of muscle moving and things happening! But thinking of just one spot, doing one thing, helps your brain focus. 
 
If you’re having trouble staying upright in your front squat, practice face-the-wall squats without a weight. They are as simple as they sound:
 
Face a wall
- Step in as close as you feel comfortable, maybe two feet from it in the beginning. 
- Keep both of your feet fully on the floor
- Hinge back at your hips to initiate the move
- Keep your chest high, your head up, and your eyes forward
- Descend as low as you feel you safely can without falling backward
- Edge yourself in closer or out farther, depending on what you feel you need
- The goal is to get to just above parallel with your thighs, like you would for your loaded front squat away from the wall
 
If you’re not used to squatting technically correct, your low back is going to light up trying to keep you stable and upright facing the wall. That’s a good thing! That’s exactly what should be happening. Maybe front squats aren’t even in your arsenal yet, and face the wall squats are your newest challenge. That’s awesome! I would rather see you comfortable working in a butt-to-heels, toes-to-wall squat, than any kind of loaded front squat. There’s more value to the mobility and strength in this kind of intentional squatting progression. I commend you for checking your ego and letting the learning happen instead. It will take you farther, longer. 
 
If face-the-wall squats challenged you, then that’s your front squat for now!  Work them until you own them! And then cycle back to them throughout your lifelong fitness journey! You can replace “front squat” with “face-the-wall squat” anywhere you see it in programming! 
 
Here’s something to get you started right now with some things we’ve already learned from earlier in the series. We’ll come back to deadlifts and another workout with them, in the next kettlebells for Stroller Warriors article! 
 
A
- 5 Face-the-wall squats (No additional weight. Body weight only)
- 5 two-hand swings
-S hake out your legs, take a breath 
**Repeat for four sets**
 
B
- 5 front squats with the bell racked on the Right side
- 5 front squats with the bell racked on the Left side
- 10 two hand swings
- 5 clean and presses with the bell on the right side
- 5 clean and presses with the bell on the left side
- 10 two-hand swings
**Repeat for three sets** If possible, use a 15lb kettlebell
 
C
Keep your 15lb bell for this kettlebell flow, where you’ll be moving from one drill to the next without resting your bell
- Start on your non-dominant side, I’ll use the left side to start for simplicity sake.
- Swing left, clean left, press left, reverse get-up, get-up, snatch, lower the bell to the front rack, front squat, dump the bell to a swing hike, switch hands at the top of that swing. 
- Repeat on the right:  swing, clean, press, reverse get-up, get-up, snatch, lower to the rack, front squat, dump the bell
- Rest or swing switch directly back over to the left side.
**Shoot for a total of six times running through the chain of drills, going back and forth or side-to side the entire set. Meaning, not three runs on the left THEN three runs on the right. The swing to switch will help keep you keep count**
 
D
Be sure to stretch your hip flexors and shoulders with your favorite stretching drills!
 
See you next time for deadlifts! Have fun playing!

-Sara

_______________________________________________________
Sara C. has been contributing her fitness and kettlebell knowledge to the Stroller Warriors community!  Thank you!

Need a refresher?  Please take a moment to read Sara's previous pieces about Kettlebells:

https://www.strollerwarriors.com/blog/from-running-to-kettlebells

https://www.strollerwarriors.com/blog/kettlebell-swings-how-to-and-how-can-they-help-my-run

https://www.strollerwarriors.com/blog/get-up-for-mobility-stability-and-flexibility-a-counter-balance-to-the-swing-run

​https://www.strollerwarriors.com/blog/kettlebell-clean-and-press-for-a-stronger-run
0 Comments

Kettlebell Clean and Press for a Stronger Run

7/15/2021

0 Comments

 
Here we are— kettlebell clean and press time! You may be thinking, “What does the clean and press, arguably a strictly strength move, have to do with my run game?” But, neurologically, strength, stability, and mobility in one area, transfers up and down the chain. In other words, strength in one place, means strength all over. Remember, our bodies are interconnected. Our brains do not “see” parts and pieces, it “feels” system wide— everything works together in the gait cycle. Very basically, energy flows: from the ground, into your heel, up into the ankle, knee, hip, crosses at the pelvis, into the spine and back muscles, over to the opposite shoulder, elbow, and wrist, as well as moving up into your neck and jaw.
 
This makes sense if you consider how a bum knee effects your gait cycle. Changing the movement pattern at the knee, creates compensation in the ankle and hip on the same side. It also creates movement changes across the chain— up into the spine, into the shoulder, the neck, and even across to the other hip, knee, and ankle. This is why when you have a “bad knee” you start noticing other little aches and pains that may me “unexplainable.” It started because your brain is working around the pain signal coming from “a bad knee.”
 
This is why the clean and press can improve your run! A slow and steady weighted exercise for your shoulder is not just making changes in your shoulder strength— it is working core stabilizers and making changes to shoulder mapping. That mapping has neurological carry-over to how your shoulder “talks to” your hip in the gait cycle. Clarity in one area, creates clarity in other areas. And because our brains are wired for survival, loaded inputs get mapped more quickly.
 
Let’s take a look at how to clean and press and then some basic ways to implement it in practice. A safe clean and a strong smooth press go hand-in-hand. If you have a bad clean, just toss it away and re-clean. The clean is the platform for your press. DO NOT rush it.  A key point to remember in the clean and press is this: keep your shoulders low. It is really tempting to clean with your shoulder shrugged up toward your ear, jamming the whole area. This 100% defeats all the benefits of both the clean and press.
 
You can think of the clean as a way to get the bell from the ground, to the rack position. The rack is the platform on your upper body for holding any kind of weight. Cleaning a kettlebell can come with frustration. It took me a solid year of working it to finally get it just right in the landing. Banging your wrist at all, by over-powering your hip drive, or letting the bell get too far from your body, is a missed clean. The bell should “wrap around” your forearm. This happens by keeping the bell in close and tight. Do not swing the bell away from your body, like you would for a kettlebell swing. The set-up, lower body, and hip drive are just the same as in a swing.
The set up, lower body, and hip drive are just the same as the swing
HOWEVER, in a clean, the upper arm stays glued to the ribs and the hip drive is less aggressive. You will have to play around with the “gears” of the hip snap to get a feel for popping them just enough to give the bell just enough energy to land in the ‘V’ of the upper and lower arm as you stand up tall. This is where all the fine-tuning of swing practice can be helpful!
 
It is tempting to think of cleaning to your shoulder. But, think instead of cleaning low, to your waist, not up to the shoulder. When you clean low, with the target landing at belly-button level, your torso takes the hit and absorbs the load. There is a lot more body to “take the hit” at the waist, than there is at the shoulder. Be sure to brace for the landing of the bell just as you would if someone punched you in the guts!
Upper arm is glued to the ribs, use just enough hip snap-- popping the hips to land  the bell in the 'V' of the upper and lower arm as you stand tall
​Do not let the bell win and knock you backward at all. Be strong. Stand up to the incoming hit and own the load. Do not let the load own you! You are in control. Be sure the bell lands outside of your breast tissue. Your forearm and biceps should be one in front of the other. Do not rest the load on your chest. I do not want to belabor the clean, but I hope you are seeing how important the set-up is for a safe and successful press!
Picture
Successfully finished the clean, now step up for the press 
​Once you have a solid clean in the rack position, nice and low, without jamming the shoulder and neck, continue to create space in the area as you press the bell up. Meaning, do not let your shoulder rise as the bell rises. I like to think of the shoulder articulating, opposite and equally, in time with the elbow— as the elbow goes up to lockout the bell overhead, the shoulder is rolling back and down into the socket for a solid lock-in. You will feel your lat, underneath your armpit, start to fire as your elbow moves up and off your waist. This is a good thing! Be sure to keep your forearm vertical for the whole press. Do not let your elbow rise before your bell.
 
At the top of your press, lockout the bell overhead, stand tall, check your form like you did at the top of the get-up (see the get-up article for details on that!), then reverse the drill until your bell is low in the rack. You can dump the bell and re-clean it, or just get set and solid in your body for another press, without a re-clean. Cleans are a drill in their own rite and have all sorts of fun variations. Just be sure you have the mechanics of the basic clean down before throwing anything new and fancy into your practice 
Shoulder does not rise as the bell rises, elbow moves off of the waist, vertical forearm for the whole press
There are a variety of presses too! One that I love will help you groove a solid movement pattern and get through sticking points— the pause press! This press helped me with my pull-up sticking point! The press and pull-up get difficult when the upper arm is at about 90 degrees. There is a transition that happens here. I noticed that if I held an isometric contraction right there at the tough point, I was able to gain strength right there and override whatever fear would happen through that spot. You can hold the bell with the elbow at a 90-degree bend on the way up for five seconds, and then hold it there again as you pull the bell back to the rack for another five seconds. You can also mix it up and do an isometric hold on the way up or the way down.
 
There are no hard and fast rules, other than practice perfect form and stay mindful of the rest of your body while you are pressing. Pressing is a full-body exercise! You will feel all the places the press works when you are holding the bell at the 90, especially your core and low back. So be sure to squeeze your glutes and core to help protect your low back!
 
Pressing is one of my all-time favorite kettlebell drills. When I am in a pinch for time, or just need to get lifting into my schedule, I will default to the press. It hits the whole body and really makes me feel accomplished without getting smoked. You can also chain the press into all sorts of other exercises. You are only limited by your imagination.

Here is a little something to get you started and progressing into clean and presses:
 
-5 waist-level swings on each side
  Rest your bell, Shake out the tension

-1 clean, rest the bell on the floor
Repeat 1 clean on the other side

-Repeat for a total of 5 cleans to each side, resting the bell on the floor between each rep
Rest and shake it out

-1 clean, 3 pause presses for 3 seconds on one side
Safely rest the bell on the floor like you would for your swing set-up, and repeat for 1 clean and 3 pause presses on the other side
Rest and shake it off

-3 clean and press right, (re-clean after each press,) swing to switch hands,
3 clean and press left, )re-clean between each press)
Rest for two minutes

-Repeat the series for a total of 4 to 5 rounds.

--------------------------------------------------------
Thank you, Sara C. for your continued support to the Stroller Warriors® community!  Need a refresher?  Please take a moment to read Sara's previous pieces about Kettlebells:

https://www.strollerwarriors.com/blog/from-running-to-kettlebells

https://www.strollerwarriors.com/blog/kettlebell-swings-how-to-and-how-can-they-help-my-run

https://www.strollerwarriors.com/blog/get-up-for-mobility-stability-and-flexibility-a-counter-balance-to-the-swing-run
0 Comments

Get-up for mobility, stability, and flexibility: A counter-balance to the swing & run

5/20/2021

0 Comments

 
The get-up ranks a very respectable #2 in my “Foundational Five-the-Thrive Kettlebell Exercises.” I first read about it in Pavel Tsatsouline’s book The Russian Kettlebell Challenge. The description was along the lines of: it comes from a friend in the Brazilian Ju Jitsu world and it is a way to get from the floor to standing. It has evolved to be more technical over the years. Keep this sentiment in mind as you practice: The only wrong way to do a get-up is practicing without intention, without purpose, and without safety as an outcome. In other words, you can tailor your get-up to work for you. 
 
Every runner knows the toll their sport puts on their hip flexors. Hip flexors being the minimum of our bane. Tight hip flexors, low back (usually the “QL,” quadratus lumborum and psoas) aches and pains, shoulder musculature stiffness, optimizing breath and musculature, etc., etc., The list can be extensive for any runner!  We stretch before, after, between, and sometimes even during running bouts. 
 
Some of us are not born particularly flexible or liking to stretch to improve flexibility. The get-up can be a novel way to target mobility, flexibility, stability, and fluidity of your body mapping. Who does not like the sound of that carry-over to a smoother and more enjoyable run?
 
It is a true beauty in the sum of its parts. Now we will break down those parts and relate them to how they can be an alternative, or perfect addition, to your current stretching and flexibility programming. 
 
*** Before we start our “How-To,” I highly recommend practicing get-ups without a kettlebell for a solid session or two of at least ten minutes each. You can then try using a light dumbbell to get acclimated to having weight in your hand and overhead for a few sessions. Once you have the SKILL of moving through its transitions, only then should you add a kettlebell. Ladies start with a 15-pound kettlebell, gentlemen start with a 25- or 35-pound kettlebell. The kettlebell breathes a whole new dimension of life into the get-up, so be ready for lots of additional stabilization when you advance! ***
 
Even though you will be starting your first-ever get-up practice without a bell, visualize that you are using a very heavy bell. Respect the process here and now--you will thank me later! Get-ups themselves do not require a lot of space— just enough as tall as you are lying and then standing with your arms stretched up over head.  I do recommend having a nice open area— away from people, pets, and anything valuable. Even though the get-up looks standardized, it is not easy! It is going to also put your visual and vestibular systems through their paces!
​
​How-To:
Start with lying supine (on your back) on a floor that is kind to your knees, but not squishy and unstable. Your weight (or once you add it) will be at your side on the floor— at belly button level, no higher than chest level, and about half a foot away. Do not make the mistake of lying so close to your weight that you have to wriggle your way to get your grip on the handle. This is just silly...and it looks it! It is not a solid start to what should be a solid drill.  Whatever side your bell is on, that side knee is bent with the foot flat on the floor. 
 
Let’s Roll!
-Roll your whole body toward the bell, let’s say you start with it at your right side. 
-Roll to the right.
-Grip it by the handle with your right hand from the underside. 
-Put your left hand on top of the handle and your right hand’s fingers. 
-Bring that baby in close with both your hands, pulling it toward your right armpit. 
-Roll to your back, with the bell now at your right shoulder/armpit, still holding with both hands.  Use both hands to raise it up over the right side of your chest. 
Picture
Let's Roll!
*** At this point, we want to get the weight into a solid position so that as we move up from the floor and into standing, it is locked down and into the socket. We will be working all the little stabilizers in and around the shoulder, in addition to the triceps, as well as the big back lat muscles. Meaning, if your shoulder is not engaged, but instead it is just pressed up and floating around without the help of all the upper body, you are totally defeating the purpose of this part of the get-up. Get the shoulder down and away from the ear. Keep a “long neutral neck.” ***
 
Now that the load is locked-in, you can release your left hand and place it at about 45 degrees from your left side. You do not want it so close that you can not use it as an assist in the next step, if necessary. 
 
Bonus drill #1: A helpful drill in and of itself, at this point, is to move the shoulder into internal rotation then external rotation a few times. Do this with no weight or exceptionally light weight! Think of it as an accessory proprioceptive mapping exercise. It is not a circus move like the full-blown get-up has a history of with strong men like Arthur Saxon. 
 
Bonus drill #2: You can also practice moving from supine to prone (from lying on your back to lying on the belly) with the shoulder up and overhead here. Again, use a light weight, or no weight at all to feel through the mapping of this bonus exercise for your shoulder. You can then do a few internal/external rotations lying on your belly too. Stretching all the tissue in a new way may help your run feel a little lighter from your shoulders being looser! Go slow and intentionally with these. 
​Get-up Sit-up
-With your arm down and in the socket and your weight above your chest, (NOT YOUR FACE!)
-Eyes on the bell.
-Dorsiflex your left foot: Extended through the left heel towards the opposite wall.
-Take a belly breath in to protect that spine.  (Keep your left heel glued to the floor!)
-“Punch and crunch” up to either propped on your left elbow, or fully sitting up, both with a proud chest!
 
Bonus drill #1: This sit-up can be worked for reps: going up to sitting (or elbow as a modifier), then rolling one vertebra down at a time, to lying. Work it repeatedly, focusing on keeping the shoulder down and in, and the spine long, with a proud chest at the top. 
 
Bonus drill #2: I like to do a handful of thoracic anterior/posterior glides here to feel through the mapping of the spine under an awkward load. Anatomically match the glide with the breath for a fun little breathing drill. 
Picture
Get up- KB/weight above the chest. Eyes on the KB!
Picture
At the top of "Punch and Crunch"

​Lower body transition

Now that you are in a full sit-up, we need to get your lower body ready to stand-up! There are diverse ways to get your feet into position to stand. I will share the two basic lunge transitions. 
 
1. Leg switch
If you are heavier, or new to the get-up game, I prefer you practice the leg switch to get into your kneeling lunge stance. It is admittingly more intuitive. 
 
-From your full sit-up position, your right knee is still bent from the beginning of this part, and your left knee is still extended. 
-You are going to bring your left shin behind your right foot by sweeping the left heel in toward the right foot. 
-Simply lift your right foot at the proper time to get the left shin behind your right heel. 
-Now you can use your left hand to push yourself forward with a little momentum as you shin roll on the LEFT shin and move into a kneeling position.
-Your left foot will be at a funny angle, under your right thigh here, so spin that knee with external hip rotation on the left side to get that left lower leg’s toes pointed behind you.
Picture
Lower body transition: Leg Switch- sweeping the leg
​2. High Hip Bridge
The hip bridge has a lot of value. But if you cannot do it, or never advance to it, do not throw your get-up practice out altogether forever! It is just a way to do get-ups, it is not THE way. 
 
-To set-up for the hip bridge, actively press your right foot down and your left hand into the floor. With this energy going into the Earth, you will raise the opposite energy up into your hips.  You will look kind of like a slanted cross here. 
-Squeeze your glutes hard to get a little extra extension out of the hips and really work those pelvic floor muscles, the QL, and even psoas. Your quads will be working hard too!
-With your hips high, you have plenty of clearance to sweep your left foot toward your right heel, and under your right glute.
- Pull your left knee in so it is under your left hip. And now we have a nice right angle at the top of the right hip and knee, and the pelvis toward the left side, with the left knee also at a right angle. A cheesy way to remember this part is: If it is a right angle, you are not wrong! 
- Then you can spin the left knee so the lower leg is pointing behind you like you did in the leg switch get-up. 
Picture
Lower body transition: Hip Bridge
In a kneeling lunge, with your right-hand overhead, YOU MUST RE-CHECK YOUR SHOULDER!
 
*Look straight ahead now. Check the shoulder is down and in the socket, the elbow is straight and locked out, and the wrist is straight.  Just as in boxing, “there is no wrist in kettlebells.” From your forearm straight up to the sky is flush and straight. No broken/bent backwards wrists!

Picture
Kneeling Lunge
​Bonus drill #1: If you have been practicing yoga or get-ups for awhile, this is a fun little mobility drill to toss in at this kneeling lunge spot! 
 
Lower your torso, by using a right lateral hip hinge, over to the left into a mini-windmill. You can place your left extended arm (or forearm!) on the floor to the left, nice and close. Then breath in, stabilize the low back and core, reverse the windmill to a straight up spine. The spine stays long throughout this! It is a HIP HINGE, not lateral spinal flexion. You can throw in some shoulder internal/external rotations when your down in the windmill or in your kneeling lunge. Good stuff (it’s done slow and controlled and for good reason)! 
 
Bonus drill #2: A good old runner’s lunge while we are here isn’t a bad idea! Take it slow and steady and check that your shoulder can control and withstand your load before you move through the feel of this one. Match your breath with the forward and back of this mobility drill to really release tension in the hip flexor on the right side. Remember to flex your left glute to stabilize your low back and protect it! 
 
Before you move from kneeling to the next part of our get-up, tuck your back toes under, (in this case the left toes). You will have much better leverage than if the top of your foot is stretched out on the floor. 
​Up Top
We are almost half-way there! Stay with me. It gets simpler!
-From your kneeling lunge, with the left toes tucked under for leverage, and the shoulder in check, look straight ahead and stand straight up. 
Picture
At the top!
​Try not to propel forward at all here—it is bad news for your knee. 
 
There is no shame in using a prop if you need a little extra help from kneeling to standing,
Get a bench, stable chair, low table, even a solid couch arm, at the left side to push into so you can stand UP, not forward then up. 
 
You are standing! Woohoo! You made it!! Safely lower and rest your bell if you need a little breather here. I would not blame you! This is tough work. It is resiliency work! 
 
If you are good to go, let’s reverse!
 
Reverse
One way to learn the get-up in a way that may make better sense to you, is to start here, at the standing press overhead point. I often coach it from here when the floor to standing is too overwhelming. Something about getting down is wired more naturally in us. 
 
Bonus #1: Once you have learned a variety of exercises, it is fun to put them in here as part of a flow. For example, you can do a get-up, then lower the weight and press it back up. You can add a squat and/or snatch somewhere in there if you are creative and up for it. Kettlebell flows can be fun because it feels like “playing out” instead of working out.
 
-From standing with your bell in a solid lockout overhead, you will take a big step back with your left leg (when you reverse, you always step back with the OPPOSITE side leg from the bell overhead).  Make sure to give yourself enough room to lower the right knee to the floor. 
 
-From the big reverse lunge, slowly and with kindness lower your left knee to the floor. You will be tempted to just drop into the lunge. Resist the urge and keep control. Your knees do not need any more pounding. They get plenty of that on the pavement! 
 
-From your kneeling lunge, hip hinge to the right and lower your left hand to the floor TO YOUR SIDE-NOT BEHIND OR IN BACK OF YOU! 
Keep the shoulder and weight in check!
 
-From here you can start to distribute your weight into the upper body, curl your left leg in toward your right heel.  Keep sweeping the left foot out to extend the knee just as it was when we started, using more of the upper body to take the load to stabilize this kick through.
 
-With the left leg out straight again, it is time to slowly lower yourself using your core muscle back down to a fulling supine lying position.
 
Final Phase: the lower
You are not finished with your get-up until you’ve CAREFULLY rested your weight on the floor and walked away SAFELY.  Lowering your weight back to the floor is just as important as any other part of the exercise. Don’t discount it and don’t trip on your bell when you walk away!
 
Lower you bell by using both hands. Get the left hand back on the handle and your right hand, just like it helped to raise it in the beginning. You have learned by going through the full get-up, that just because the bell is on the right, does not mean the rest of the body is on cruise control. “All the body. All the time.” 
 
Two hands help the bell to the right armpit.  Two hands stay on it as you roll to the right side and safely rest your bell on the floor.  Remember, you are not finished with the set until you can safely leave the scene. 
 
Practice Session
You have the swing under your belt from my first article and now the get-up! If you never learn any other kettlebell exercises than these two, you have a huge benefit in your back pocket! Honestly, you do not even have to do swings and get-ups with a kettlebell. You can use dumbbells to practice until you get to a kettlebell. However, the dumbbell is stiff, and it will not have the same dynamics and “life” the kettlebell has. It is just a matter of physics. Gravity pulls differently on them, especially in motion because of how its handles are fashioned. Kettlebells feel a lot more playful than dumbbells to most folks, but do not let the absence of having a kettlebell stop you from doing get-ups and swings!
 
Here is something simple (but not easy) to get you going with these two exercises:
 
Set a timer for 10 minutes:
 
-Even minutes practice swings 
No need to count reps unless you want to best yourself or keep pace.
 
-Odd minutes practice get-ups 
A proficient athlete can get in one full get-up on the right in 30 seconds, one get-up on the left in another 30. So really no more than two total get-ups here (if you’re doing them properly).
 
You can, of course, move through the get-up with very light weight and work the bonus mobility drills to warm-up for your next run! Or make the ten-minute session above a finisher to your next outing. Just remember to have fun. It’s your run!
-----------------------------------------------------------------------------
Thank you Sara C. for your continued contribution to the SW community.  Need to catch up?  Revisit Sara's previous kettlebell pieces:

https://www.strollerwarriors.com/blog/from-running-to-kettlebells

https://www.strollerwarriors.com/blog/kettlebell-swings-how-to-and-how-can-they-help-my-run


0 Comments

Kettlebell Swings: How-to and “How can they help my run?”

4/22/2021

0 Comments

 
Come with me on a little time traveling journey for a few paragraphs. Let’s go back to 1999. We’re all listening to Prince (or the symbol formerly known as). We’re eating, drinking, and being merry. We’re on the verge of the year 2000. Y2K. Functional fitness is in its infancy. Concept2 rowing machine stock is low. And no one knows what a kettlebell is. In fact, when we do refer to it, we call it a “cattle bell” or a “kettle ball.” Two words. Very distinct. Often with air quotes, our faces twisted up in a confused look, plus an absentminded shoulder shrug thrown in for good measure. 
 
It’s 1999. I’m your coach. We meet at the track to run drills: ½ A march… A march…leg and foot drive…arm swing…breathing drills…thoracic and head carriage…dynamic autonomous alignment…the whole shebang. We’ve ran these before. It’s all familiar. 
 
Then I tell you I’ve come across a tool that, when used correctly, can help with ground-up athletic explosiveness, low back resiliency, and cardiovascular capacity (aka VO2 max). But also has minimal impact on the wear and tear of running mechanics like shin splints, hip and pelvic floor pain and dysfunction, and even fatigue. 
 
You have no idea what I’m talking about. But we have a trusting relationship. I step aside and there at our feet is a little iron kettle, but there’s no spout on it. You’re confused. But still going with it. 
 
I reach down with both hands and grab onto the handle of this little kettle. I squat a bit. Take a couple steps back, so the kettle is still out in front, hands still hooked on the kettle’s handle. Now it’s looking a little like I’m going to play football with this thing. I know what you’re thinking, “Where is this going?...” You’re intrigued. Then I launch this little ball back between my knees and behind my butt. Just when you think it’s launching out the back, I stand up with it. It looks like a front raise. “Did she just launch squat then front raise this thing?!? It must be like five pounds….” Then I do it again: squat-launch, front raise-stand. Squat front raise. Squat front raise. 10 reps. 20 reps. Finally, the ball comes to a rest right where it started, front and center. 
 
You’re still thinking body parts and gym-style workouts made popular at Venice Beach and by Arnold Schwarzenegger. It’s still the ‘90s after all. Which means you’re seeing it all wrong. You think you’re seeing a squat followed by a front raise. You’re definitely not seeing the connection between this bell and your run. 
 
When you run, you know about the energy flow. The whole body is working. Drawing the energy up from the terrain, the heel strike, the knee flexion, the hip extension, the cross-over up into the lats, the shoulder, the elbow, the wrist, loose hand holds the pringle. Back down the flow goes: shoulder extension, lat flexion, crossing back down and across, pelvic floor, hip, knee, ankle, foot flow, earth. It’s all there; this interlimb neural coupling symphony you fell in love with when you discovered running. 
 
But now we’re not running. We’re throwing? We’re swinging. A Kettle Bell?... It’ll all come together. Just like the word itself: kettlebell. One word. No cows. 
 
Let’s break down what happened at our track meet in 1999. Fast forward to now. It’s 2021. Kettlebells are as easy to find as toilet paper. And I’ve got a few kids of my own: a pre-teen son and a daughter hot on his heels. I also grew up with your classic annoying big brother. Let’s say big brother has a new sling shot and his first target is little sister’s squirrel-nest of hair. (You know the type: fresh off a wrestling match with the pillowcase the night before and the kind to cause a good conflict when mom goes to tear through it so we all look like we have our act together in public.) So, is big brother going to pull his sling shot rubber band back a little, or a lot? You better believe he’s going to pull back with maximal tension on that band so this spit ball launches with the most furry, has the deepest impact into his target, and sister has a hard time finding his ammo in her hair-nest nonetheless digging it out! 

This rubber band ready to launch is just like your hamstrings and glutes pulled back and your hips ever so slightly elevated at the set-up of a kettlebell swing! Maximal tension for maximal impact. It’s that high school physics lessons coming back into real-life action (finally!). The greater the potential energy loaded into your hamstrings and glutes, the greater the kinetic energy is released! 
Picture
​Once we aggressively load our ammo (in our case it’s the kettlebell) well behind our hips, we’re going to change gears from load-- to explode! We initiated the two-hand kettlebell swing with the hips, stretching the entire lower body posterior chain to its full extent. To launch, stay active in your delivery! Just before you feel like you’re about to rock too far and go stumbling back, switch directions with the bell and energy flow by initiating the glutes: drive the hips forward into full extension, and simultaneously pull the knee caps up into full knee extension, drawn the pelvic floor up too, as you stand tall. 
​Hips and knees articulate together, these joints are sending messages to the pelvic floor, glutes, and quads. Full extension, fully able to squeeze the muscles they “communicate with.” It should feel like you’re a rocket taking off from the Earth’s surface, but we’re not actually leaving the ground…Instead, dig your heels in hard, gather up that Earth energy, hit the full standing extension with bell at chest level, then go for another rep right away! 
Don’t hang out at the top of your swing! Instead, activate your lats and crank your bell handle down like you’re moving onto the next round of The Price is Right big wheel! Throw your bell back well behind your hips, feel the posterior chain stretch like big brother’s sling shot, then instantaneously, change directions from load to explode and let that ammo fly! Initiate the glutes like you would in a lying hip bridge, pull up the knees, draw the pelvic floor up and in, hit the full extension like a standing plank. This is the top of your swing. 
Picture


​Just like your core is engaged in a yogi plank, you’ll want to condition and save your low back at the top of the swing by bracing for an imaginary punch to the guts. With the glutes cramped hard, the pelvic floor drawn, and the core engaged (ribs to hips), your low back will become resilient, not weak sore, or prone to injury. This acts as a nice strong, absorbent buffer on your endurance runs!
 
With a deeper understanding of what’s happening in the Russian kettlebell swing: (hinge instead of squat, lat activation instead of delt front raise, core and pelvic floor stability instead of leaning back at the top of a swing, constant energy flow from ground up and back down again), you now have clarification on how the swing relates to your run. This concept of perpetual springy, spiraling energy flow “up and out” to “in and down” is the same nuance that separates the athletes from the injured. The folks squatting kettlebells into front raises don’t understand the interconnected beauty of what it really means to move, be human, and to embrace the flow. 
 
Watching a seasoned athlete practice their craft, is truly poetry in motion. All the work is happening internally. The intensity is there. But they have nothing to prove to the outside observer. There’s a placid calmness to their motion. It doesn’t matter if the athlete is a weekend warrior or a Stroller Warrior. The work is happening. And it’s making us better rep by rep.
 
There are tons of swing variations. The concept of form remains constant across swing variations: root with the heels, draw the energy up into the calves, pull up the quads, full extension with the hips and knees, pull up the pelvic floor, the bell swings up to chest level. Reverse momentum by throwing the bell back between your knees, keeping it high in the groin area, get it behind your glutes without rounding the low back or chest, keep the shoulders in the sockets (don’t let the bell pull them out, into distraction), weight stays on the heels at that furthest point back. Finish and start your sets with the bell out front and center. Soft landings are a must. 
 
If you’re a lady, try a 15lb bell to start with; gents try a 35lb bell.  
It’s best to practice your kettlebells outside, with no animals or people nearby, or property to damage.
Play around with variations. Have fun with your practice! Just keep your form impeccable. 
 
Here’s a simple pyramid session you can practice with one bell: 
10 2-hand swings
10 swings right hand only
10 swings left hand only
10 swings total alternating hands. *Make your hand switch at the top of the swing, when the bell is at chest level out front. Alternating/switching hands at the top of the swing is good for getting comfortable with the timing of the swing. You MUST have a complete hip and knee extension to maximize the float phase of the bell at the top. And you MUST keep the shoulder/s connected and in the socket. No need to chase your bell. 
 
No rest between each style of swing. 
Repeat for reps of 20 each. 
Rest as needed before moving on to reps of 30 each.
Then work your way back down to 20 reps each. 
Finish with 10 reps of each grip.

---------------------------------------------
Sara Cheatham recently contributed to the SW community last month with her introduction piece about kettlebells :

https://www.strollerwarriors.com/blog/from-running-to-kettlebells 

We look forward to learning more about kettlebells with Sara over the next few months!  
0 Comments

From Running to Kettlebells

3/18/2021

0 Comments

 
​I met Stroller Warriors® Global Staff Team member, Rose, while we were stationed at Malmstrom AFB around 2011. We were both early in growing our families we had our own little community of moms that were having babies, recovering from having babies, trying to have babies, and holding on through long days and longer nights. Our friend circles crossed when one of my functional fitness friends said, “You should meet Rose! She’s into functional fitness too!” Here we are a decade later, still connecting through fitness!
 
When Rose asked me to write a kettlebell piece for the Stroller Warriors community, I was insanely grateful for this opportunity to contribute! But, my immediate thought was, “Where do I start?!?” I am known as a kettlebell coach, but I am also a runner. Running is my fitness first true love. It has always been my escape. If I have something tough to tackle in life, I hit the pavement. I do not run for time. I do not run for medals (but that can be exciting). I do not run with friends (but that is always a nice bonus if it happens too). I have been in love with running for running’s sake since I was introduced to the timed mile-run in sixth grade. 
Picture
​Maybe you are this type of runner too: You and I run for the pure feeling of being free. We run because it just plain feels good. Running is freedom for us. It is the ultimate escape from all the bull of “adulting.” The repetitious, rhythmic sound of your feet cycling over the terrain, the cool autumn breeze, sprinkles of rain, the sand as it caves under bare feet on a beach run at sunset…we run for clarity.
 
I still remember the run along my old country dirt road back when I was a kid in Arkansas— how the cows looked in the fields with their head bent down, how the headstones looked as I circled through the cemetery to loop back home. I still remember my runs in college—the rolling hills and long stretches of tall grass blowing alongside those back roads, and those steep hills in the shadows of the University of Arkansas. Running is a memory in motion.
 
I remember my runs at each place my family has been assigned over the past 17 years: Nellis’ desert landscape and jumping over boulders just for fun. Pope and the sound of Jodie’s at 0600 with all the soldiers lined up for their morning PT, helicopters flying and jets taking off. It was a busy place. Running made me feel like I was a part, or had a part in it all.  We were at Malmstrom when the base was demolishing all the old houses and rebuilding. I would run through those ghost streets, and every now and then come across a house with workers. I would stop to nurse my second baby on those runs, with those strangers across the street, while my first baby played in the empty lots. After Montana, we moved back to Nellis. This time I had two big toddlers in tow and I was pushing them up, down, and around all of base housing. We would see roadrunners, ground owls, lizards, quail families, mushrooms, the Joshua trees, and we learned about the star constellations, and even witnessed a Russian rocket transition back into Earth’s stratosphere! Those desert nights are some of my favorite memories…and they happened because I loaded up my babies night after night, day after day, and we just ran for the sake of it.
 
Running is the ultimate blend of those basic human needs for freedom and to dance with Mother Nature. Running can be done anywhere, at any time, alone, or with your people. You do not need special equipment. You do not need fancy shoes, or any shoes at all. The rhythm of running, as an escape into a time of gratitude and mental clarity, is real freedom.
 
My journey with kettlebells started as innocently as my start into running. One little event layered upon another. I simply showed up to fitness every day. My then boyfriend, now husband, brought me a kettlebell back from his kettlebell certification. I started playing around with it. Much like I would do in my runs, I was just having fun with the feeling of doing kettlebells. 
Picture
​Running for me is not a way to keep score. Kettlebells are the same way. Running does not require a lot of “bells and whistles.” Kettlebells are the same way. I still have my original set of three bells from 2003 (8kg, 12kg, 16kg), using my 12kg most. If it came down to it, I could get everything I need in training from that one bell. I call her Ashley. She is akin to Tom Hank’s Wilson. We have been through some tough stuff. She is always there to help me out of a funk, get me moving, and cheer me up. She helps me clear my mind with that familiar, repetitive, rhythmic movement. Running is the same way.
 
What are my favorite rhythms to fall into with Ashley? I love a long-cycle snatch ala the Viking Warrior Protocol by Kenneth Jay. I love a good therapeutic set of get-ups paired with swings (in some circles this is known as “The Inferno”). I love chaining the basics together into a nice flow. It might look something like: Swing, clean, squat, press, get-down, get-up, snatch, windmill, and repeat for reps. That same mental clarity from a running turnover is the same feeling I get during a snatch cycle. I can settle into my body, get grounded, and feel connected. 
If you want to pick up a bell, first, start with the basic swing. This is like learning the basic running mechanics of foot placement in the turnover and your cheek-to-cheek drills. Next, add the transitions of the get-up. The therapeutic feel of the flow from ground up in the get-up will benefit your body awareness, shoulder stability, and hip mobility for runs too. After swings and get-ups are well practiced, move into additional movements with cleans & presses, and squats & deadlifts. Once you are solid and confident in the mechanics of the swing and clean & press, top off your sessions with snatches. These are my “foundational five to thrive.” (Swing, Get-up, Clean & Press, Squats & Deadlifts, Snatches.) This is my starting point for every client. There are so many variations of the basics that your programming can take you anywhere with a little imagination and investment in reps.
 
Running and kettlebell swings are actually the first “workout” I ever did with my first bell. Running is what I knew. I just added the novelty of swings to it. This is what it looked like:
 
10 sets of:
-25 two-hand swings
-1/4 mile jog
 
It was so simple. It was so fun. I was still outside. I was still running. I was progressing along my fitness journey. It continues to this day. I still love to swing and snatch for the sake of it…and, I still love to run for the fun and feel of it. 
__________________________________________________________________
Picture
​Sara Cheatham M.S., was the first ever female promoted to Senior Russian Kettlebell Certified Instructor in 2007. She has a Master’s in Health Sciences: Community Health Promotion from the University of Arkansas. She is a Z-Health Neuroscience Education Master Practitioner, a 17+ career USAF wife, and veteran homeschooling mom of three. In the mix of all the moves and babies, she’s managed to keep her love for movement and coaching alive through her sheer determination to help other moms realize their strength beyond babydom, wife-ing, and PCSes. 

Please stay tuned over the next few months, as Sara will share her knowledge and expertise about kettlebells with the Stroller Warriors community!
0 Comments

Why am I Leaking with Running or Impact?

2/18/2021

0 Comments

 
​A few of our SW members shared stories or asked questions about the pelvic floor and leaking while running, or when exercising.  One of our members reached out to Dr. Foley, who graciously supplied some useful information and techniques, see her inputs below:
 
Leaking while running is very common for many women. It can happen after having children, or and in some cases it happens to female athletes. Unfortunately, finding a treatment for the problem of leaking while running is not simply found through doing one or two exercises. The top four approaches I recommend to decrease leaking while running are: 1) relaxing the abdominals; 2) posture; 3) strengthening the gluteus medius; and, 4) retrain the system with breath to accommodate the load of running.
 
There are many contributory factors that cause leaking during physical activity.  First, one must identify when they experience leaking- does it occur at the beginning or end of the run? Does it happen while running downhill or only when running fast? Does leaking happen during the entire run, or only after the run?  Does leaking occur while jumping?
 
A few often helpful strategies are to change one’s posture and to change how one engages the abdominals. I’ve seen many patients who held in their abdominals all day long, and even more during higher levels of activity. Studies have shown that women with incontinence can have good activation of the pelvic floor, but over stabilization of the external oblique. People do not need to pull in their abdominals all the time and definitely do not need to be doing it more with higher level activity. There is a pressure system from the diaphragm to the pelvic floor. This system must have the pressure distributed evenly or the system will fail. The diaphragm sits underneath the rib cage, while the pelvic floor is at the bottom of the torso. What is in between the two? The abdominals. If there is constant activation of the abdominals, it will increase the pressure towards the pelvic floor. A good way to see if this is happening is to simply look at the abdominals. There may be a kink in the upper abdominals, pushing out the lower abdominals. 
Picture
​Letting this tension go and relaxing the abdominals will allow the pelvic floor to function the way it is meant to be used. For example, at heel strike, the pelvic floor moves down and forward- if there is already pressure on the pelvic floor due to gripping the abdominals, the addition of the heel strike impact (while running) could lead to leaking.
 
The second most important thing to focus on is posture. 
Picture
​The rib cage and the pelvis must be in alignment in order for the pressure system to be used effectively. The first picture (above, left) features rounded shoulders which brings the rib cage behind the pelvis while the pelvis moved forward. This increases the pressure through the system. With running one needs to bring the rib cage and pelvis in alignment, but also lean slightly forward to distribute the impact of running. Leaning forward can also improve hip extension which powers of our movement. Rotation is the other important part of movement with running. During pregnancy, women adopt compensatory strategies for movement;  oftentimes, this results in a side-to-side movement rather than rotation due to the baby growing in the abdomen. When women lose that rotational movement, it may take retraining the brain and body to get this movement back. Women must ensure they rotate at the trunk with walking and running. When running, women want to concentrate on landing softer with the feet, making sure there is space between the legs, rotation in the arms and trunk, and while leaning forward (similar to leaning into a strong wind).
 
Third, to support the pelvis, you need to have strong gluteus muscles. To test if your gluteus muscles are strong and supportive, one can perform a single leg squat. If the knee moves inward, this indicates that the gluteus medius is not helping to support that activity. During running, each time one takes a step there is impact upon a single leg. If the glutes are not supporting this activity, pressure is placed on other areas such as the knee or pelvic floor. To strengthen this, one can perform a single leg squat in front of a mirror while holding onto a countertop for support. In doing this, one can perform the squat at different depths and with different levels of assistance, i.e. holding on with a whole hand versus a finger for extra support.
 
Sometimes one needs to change how the brain is working instead of strengthening the pelvic floor. The way to do this is through breath and with graded exposure to the activity of difficulty. If the activity is jumping, then one must unweight that activity and focus on breath. For example, start with plank jumps to improve jumping jacks, or even heel strike without leaking. First, start with a slow plank jack with an inhale, then exhale and jump both feet out. Then, move to inhale jump, exhale jump, and from there one can increase width between the feet, or increase the speed. The breath connects the brain and the activity. From the plank jack, one can perform a supported plank jack on a chair or couch, and then ultimately perform an actual jumping jack. As one transitions the from a plank jack to a jumping jack, they change the load on the pelvic floor.  Then most important things to consider are when there is leaking it is a sign that the system needs a new strategy and running cannot be effective with a stiff pressure system.
 
If you have additional questions, seeking advice from a pelvic floor physical therapist would be a good resource to help get back to the activity you love.

​************************************************************************************************
Dr. Courtney Foley, PT, DPT, PRPC is a pelvic floor physical therapist who is currently practicing in Charlotte, NC.  Thank you for taking a moment to provide some helpful advice to the Stroller Warriors® community! 
Picture
0 Comments
    Meet the Authors

    Categories

    All
    Community Outreach
    DIY
    Duty Stations
    Founding Stories
    Gifts For Runners
    Inspiration
    Member Spotlight
    Races
    Running Tips
    Running With Your Dog
    Shoes
    Strength Training/Cross Training
    Stroller Warriors By The Numbers
    Trail Running
    Treadmill Running

    Archives

    March 2023
    February 2023
    January 2023
    December 2022
    November 2022
    October 2022
    September 2022
    August 2022
    July 2022
    June 2022
    May 2022
    April 2022
    March 2022
    February 2022
    January 2022
    December 2021
    November 2021
    October 2021
    September 2021
    August 2021
    July 2021
    June 2021
    May 2021
    April 2021
    March 2021
    February 2021
    January 2021
    December 2020
    October 2020
    September 2020
    August 2020
    June 2020
    May 2020
    April 2020
    March 2020
    February 2020
    January 2020
    December 2019
    November 2019
    October 2019
    August 2019
    June 2019
    May 2019
    April 2019
    March 2019
    February 2019
    January 2019
    December 2018
    November 2018
    October 2018
    September 2018
    August 2018
    July 2018
    June 2018
    May 2018
    April 2018
    March 2018
    February 2018
    January 2018
    December 2017
    November 2017
    October 2017
    September 2017
    August 2017
    July 2017
    June 2017
    May 2017
    April 2017
    March 2017
    February 2017
    January 2017
    December 2016
    October 2016
    September 2016
    August 2016
    July 2016
    June 2016
    May 2016
    April 2016
    March 2016
    February 2016
    January 2016
    December 2015
    November 2015
    October 2015
    September 2015
    August 2015
    July 2015
    June 2015
    May 2015
    April 2015

    RSS Feed

    Miles>>
Proudly created by Stroller Warriors®, a Registered Trademark