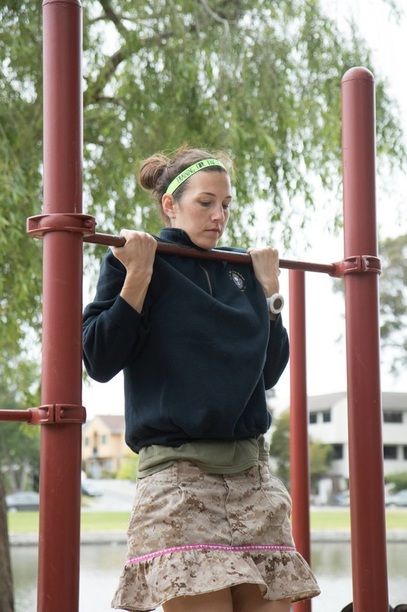
The first SW PFT Skirt I ever made. Photo Credit: Vicki Diesing Photography
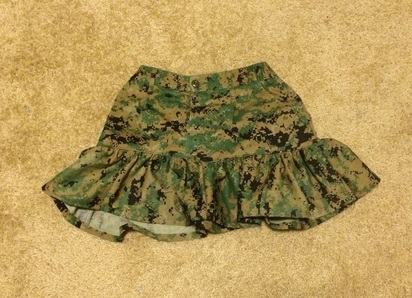 The skirt you are going to make!
 Oh Military living, and how used to acronyms we get! In case you were confused by the title, this blog is going to teach you how to make a skirt from military cami pants for a Stroller Warriors Physical Fitness Test (PFT). If you're a seasoned Warrior, you probably know exactly what I'm talking about.
Keep reading to learn the history of the Stroller Warriors PFT, as well as, learn how to make your own cute skirt!
Way back in the day our Fearless Founder, Stephanie Geraghty, was looking for a way to measure our improvement as runners and athletes. After much thought and deliberation she settled on the Marine Corps Physical Fitness Test. Why the Marine Corps PFT instead of the Air Force, Navy, Army or Coast Guard PFT? Because the Marine Corps PFT has the longest running distance (3 miles), and we are after all a running club! We don’t switch around between PFTs (Marine Corp one time, Air Force the next, etc), because if the unit of measure is always changing, how would you be able to tell if you are making progress?
The Stroller Warrior PFT mirrors the Marine Corps PFT and consists of a 3 mile run, 2 minutes of sit- ups, and a flex arm hang or max pull-ups. In true SW fashion, our PFT is more about FUN and fitness than anything else! We encourage dressing up to represent your branch of the military or in patriotic gear. We even dress the kids up! We give prizes for best dressed, not best PFT score.
This blog post is dedicated to those of you who own a sewing machine and would love to try an easy way to spice up your decorative SW PFT gear.
What you need:
A sewing machine
Sewing scissors or a rotary cutter
A ruler
An old pair of cami pants (these can be donated by your husband or a friend’s husband or found at the thrift store).
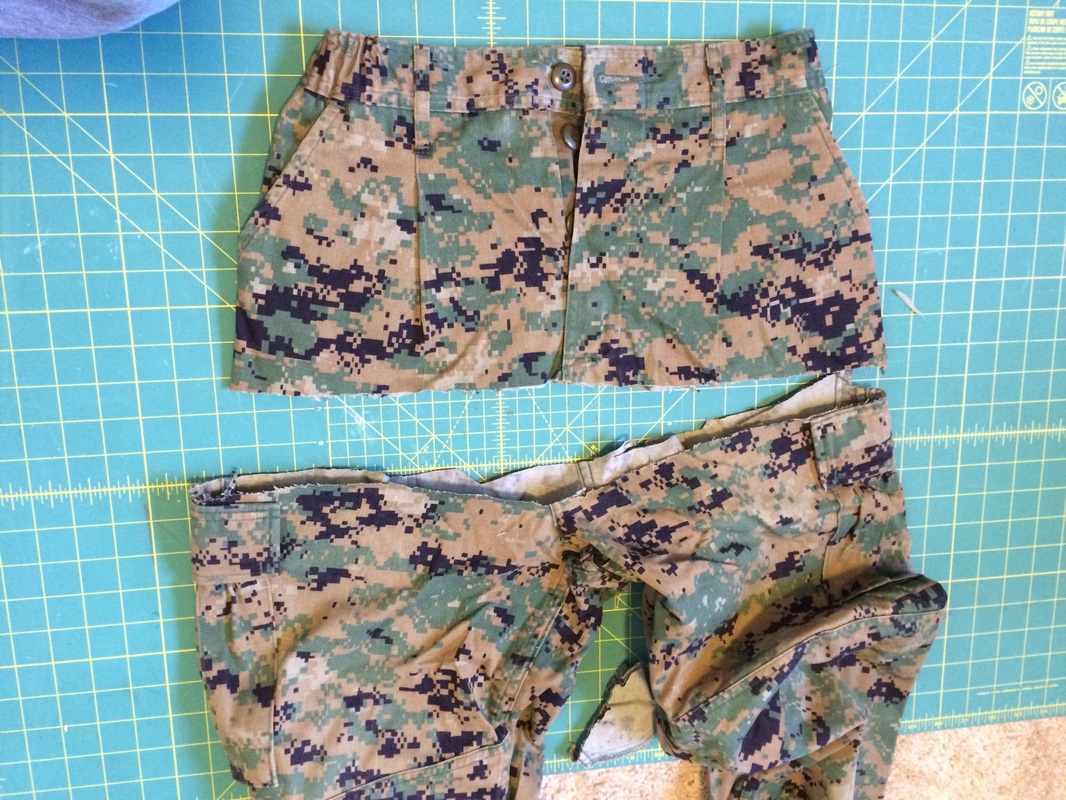
Step 1.
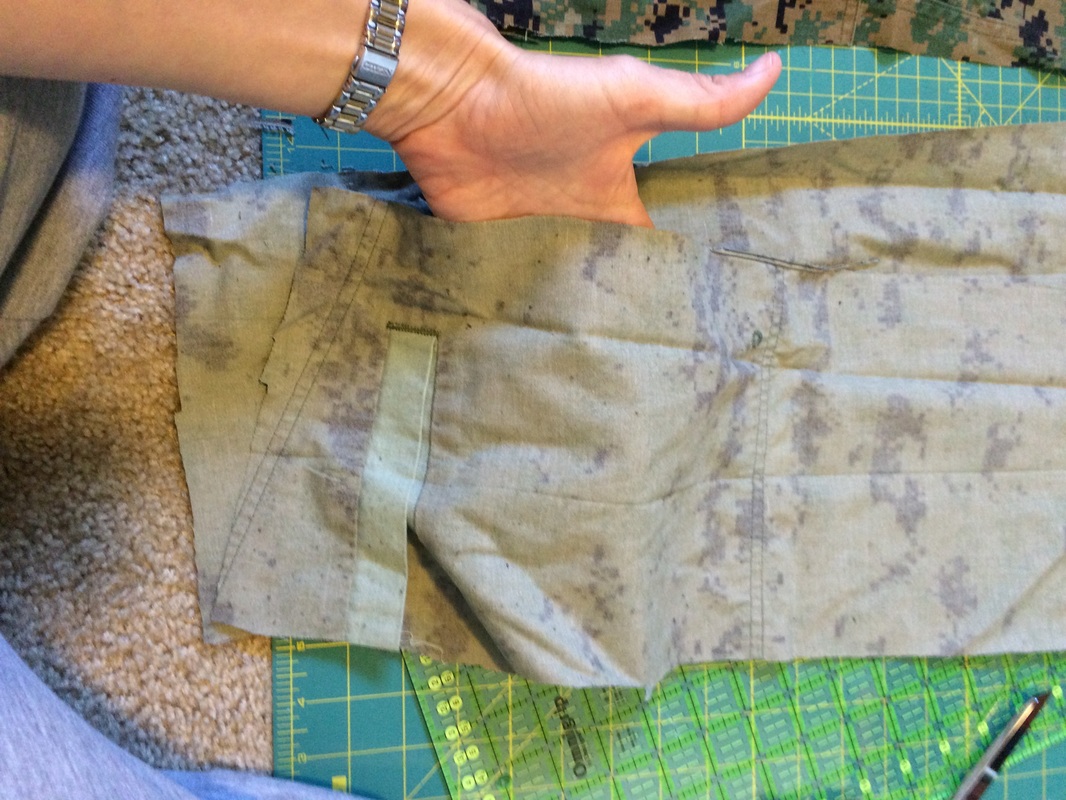
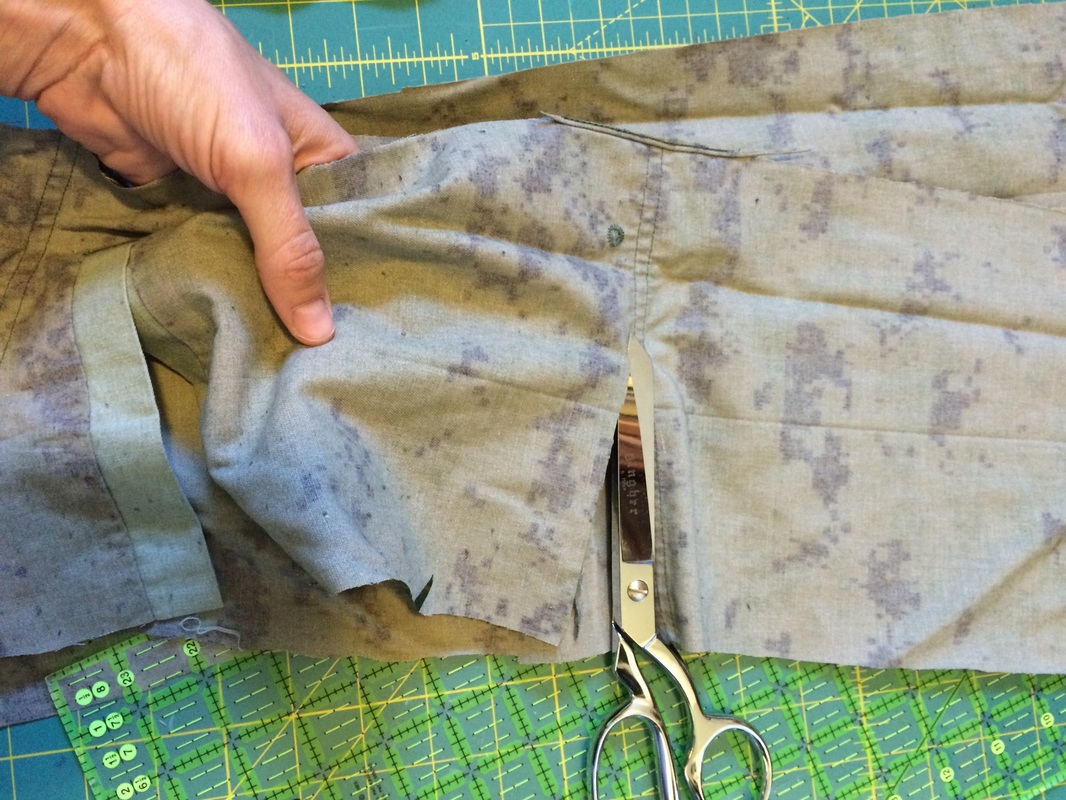
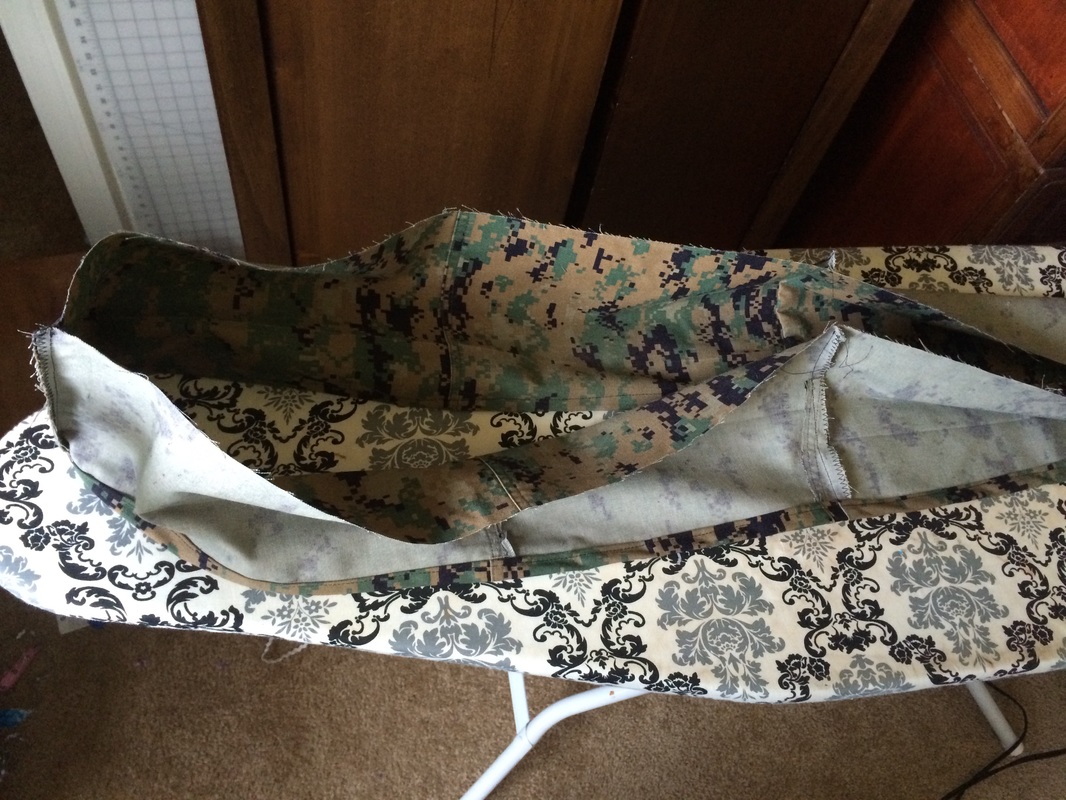
Measure and mark your pants where you want to cut them. Cut them somewhere that is below the fly and above the crotch. Make sure your line is even and not crooked. Cut through all layers (even the pockets).
Measure and mark your pants where you want to cut them. Cut them somewhere that is below the fly and above the crotch. Make sure your line is even and not crooked. Cut through all layers (even the pockets).
Step 2.
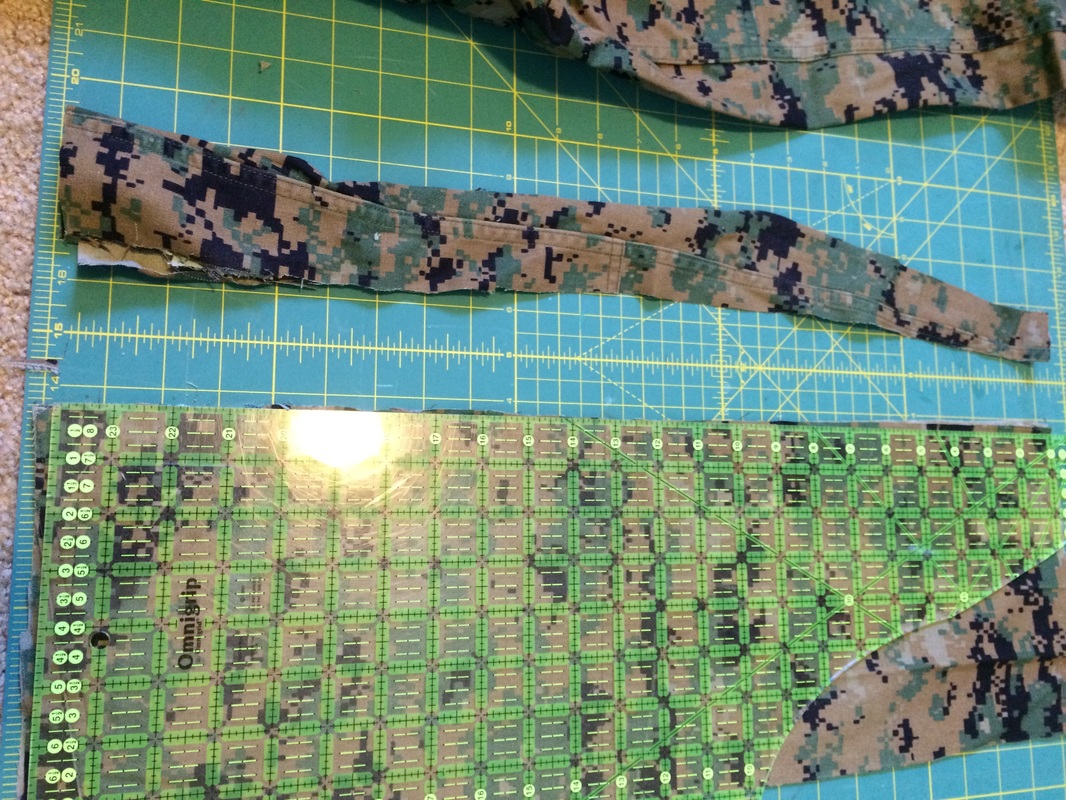
Use the pant legs to cut strips for the ruffle of the skirt. You’ll want to measure the widest part you can make it (at the ankle of the pants) and then cut it as long as you can. After you cut you should have two identical strips (from the front and back of the pants). I was able to get two strips from each pant leg (4 strips total) of 7inches by 22 inches.
I decided to only use 3 of the strips to get the amount of ruffle I wanted.
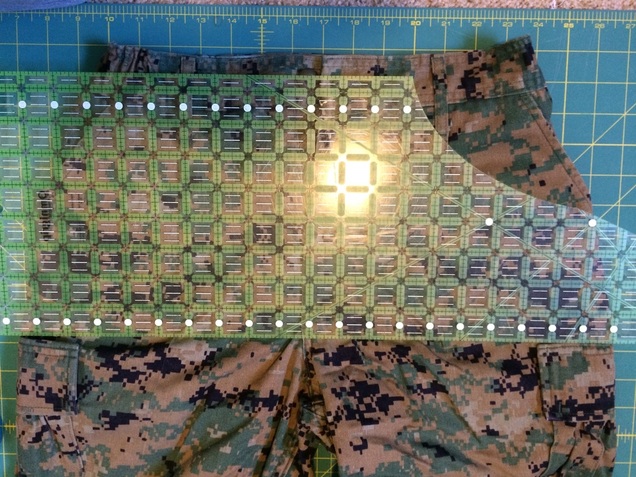
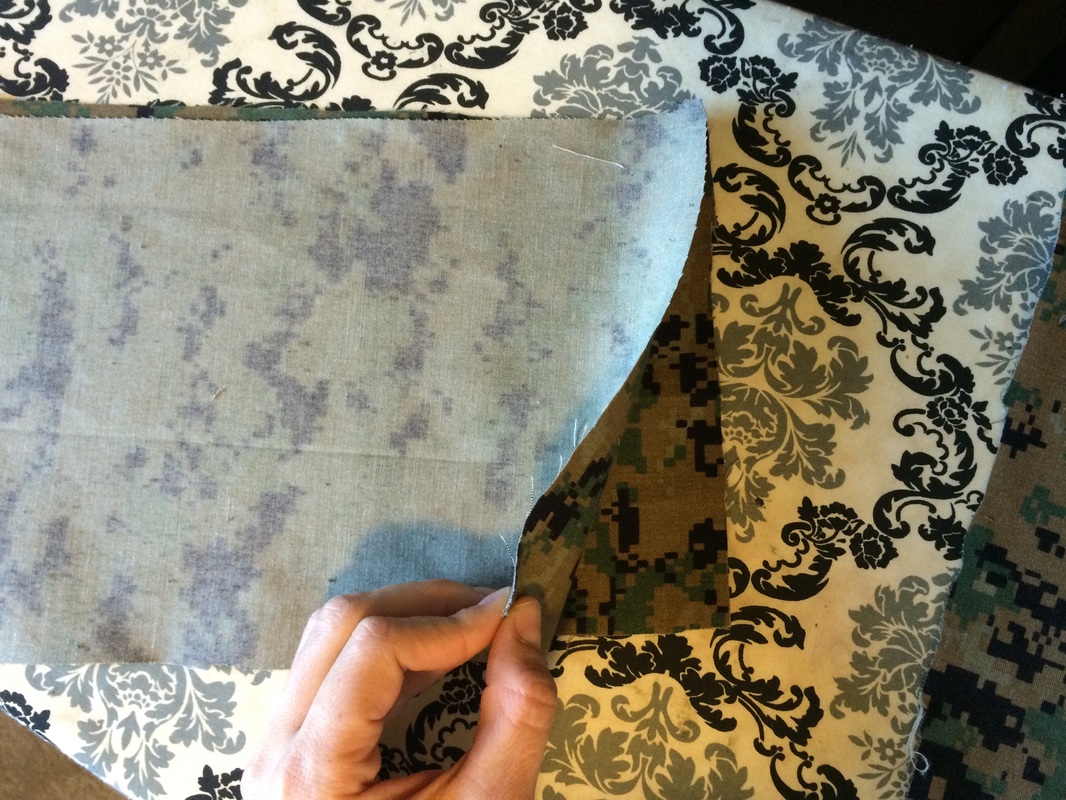
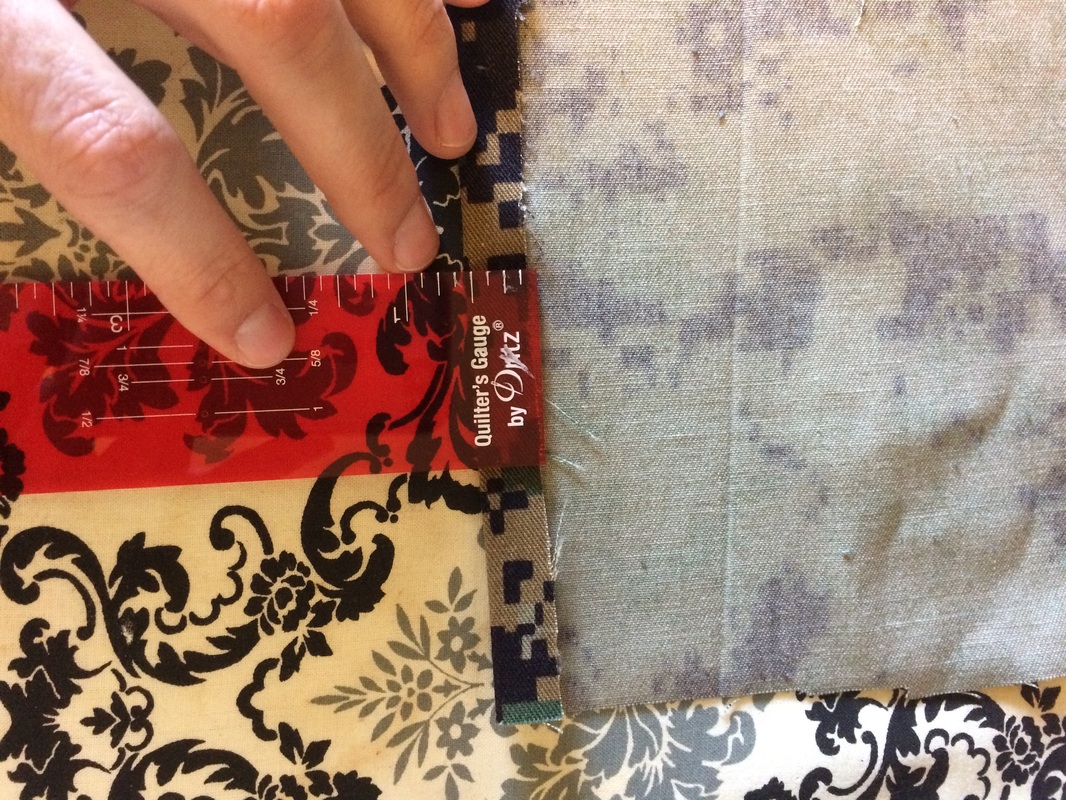
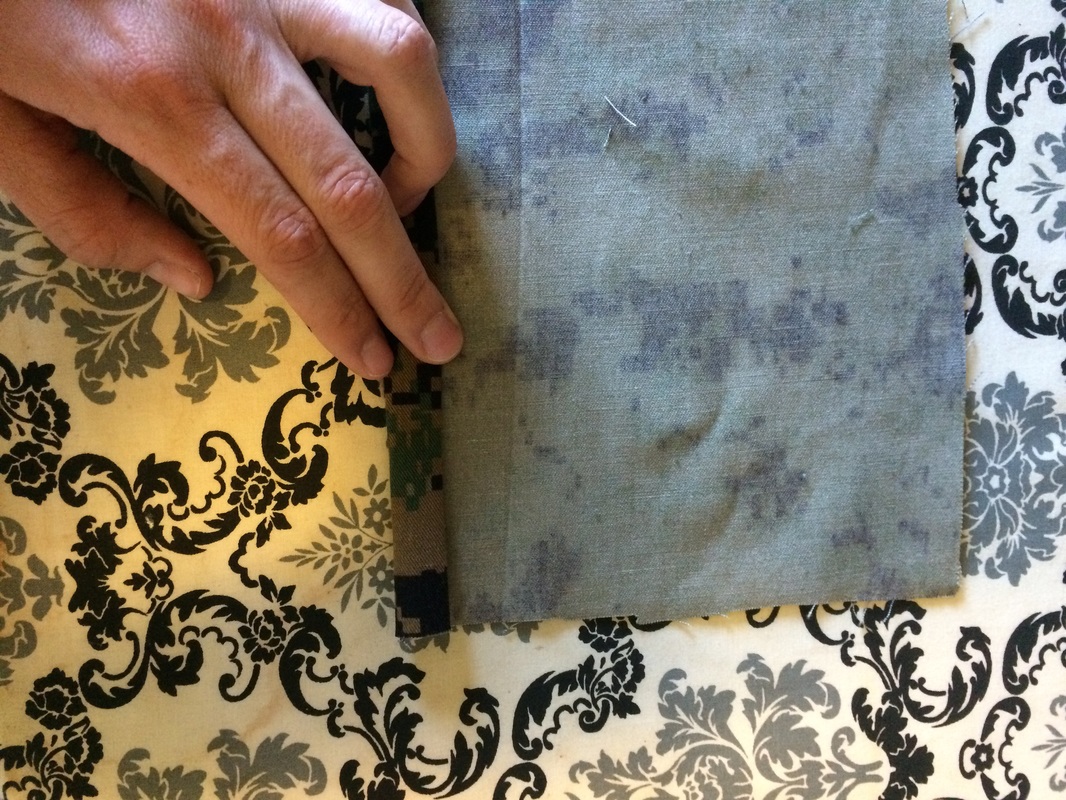
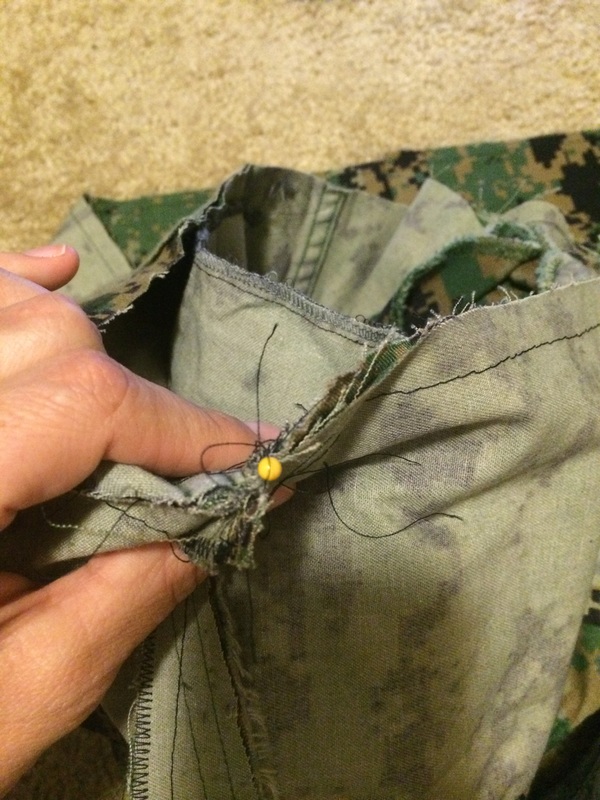
NOTE: Some military cami pants have certain sections reinforced due to high wear. Or they have sections with interesting pockets. You can cut off any extra fabric you don't need to make it one piece of fabric. In my opinion extra seams just add more character to your creation! See an example of what I'm talking about below.
Step 3.
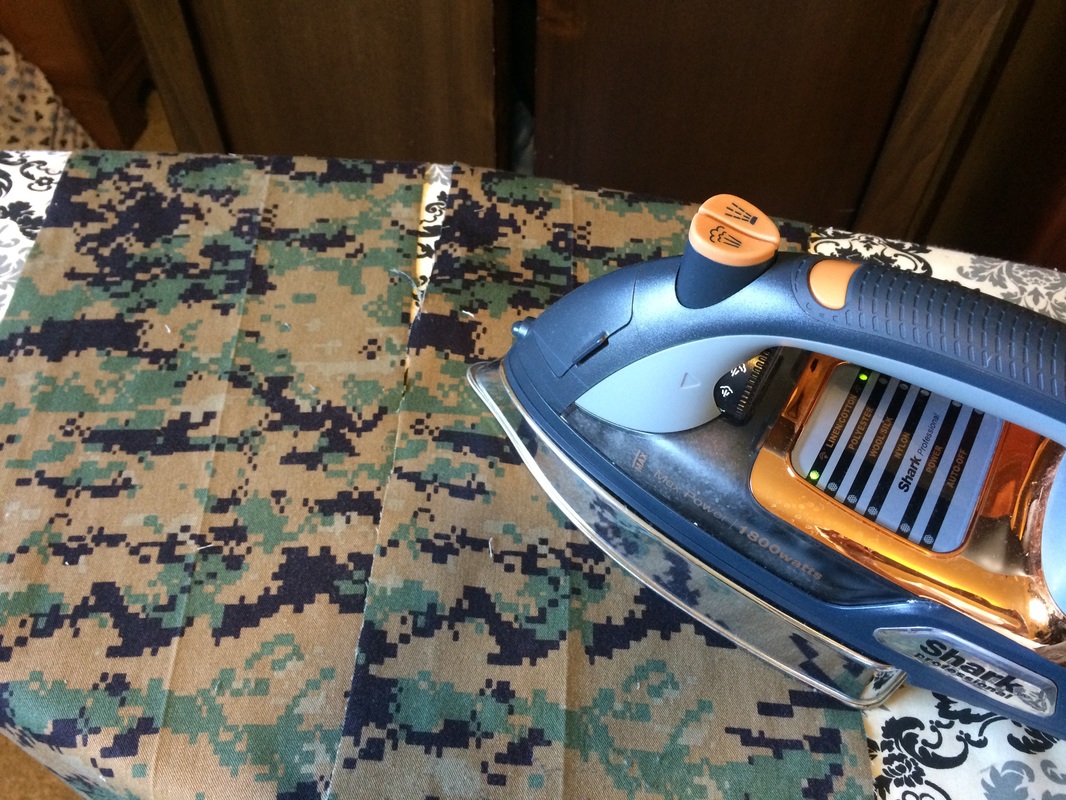
Iron these strips to make sure they are flat.
Iron these strips to make sure they are flat.
Step 4.
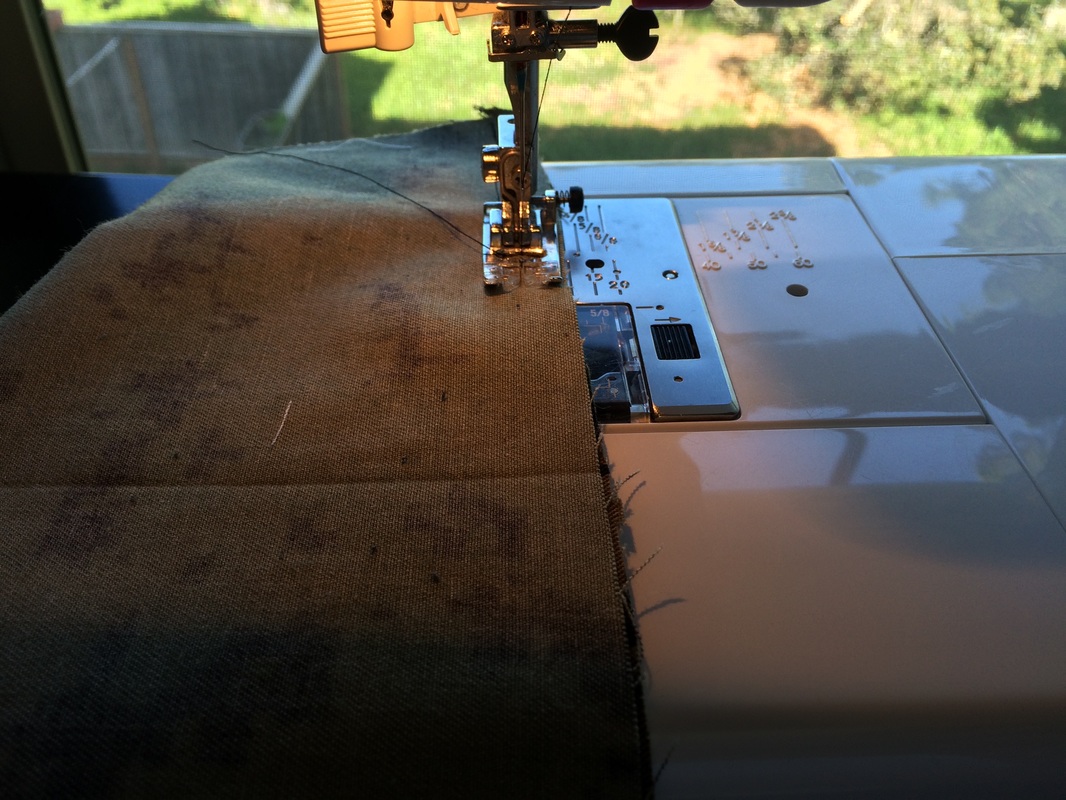
Place them right sides together and sew with a .5 seam allowance along the short side. Zig zag or serge the sewn end. Keep placing strips right sides together and sew the short sides together until all strips are sewn together. Then sew the two ends, right sides together to make a circle.
Place them right sides together and sew with a .5 seam allowance along the short side. Zig zag or serge the sewn end. Keep placing strips right sides together and sew the short sides together until all strips are sewn together. Then sew the two ends, right sides together to make a circle.
Step 5.
Iron the seams flat. Iron a hem on one side of the circle. You’ll do this by folding up ½ inch and ironing, then fold up again ½ an inch and ironing.
Iron the seams flat. Iron a hem on one side of the circle. You’ll do this by folding up ½ inch and ironing, then fold up again ½ an inch and ironing.
Step 6.
Sew the hem using a straight stitch. Make sure to back stitch at the beginning and end of your stitching in order to lock your stitches in place.
Sew the hem using a straight stitch. Make sure to back stitch at the beginning and end of your stitching in order to lock your stitches in place.
Step 7.
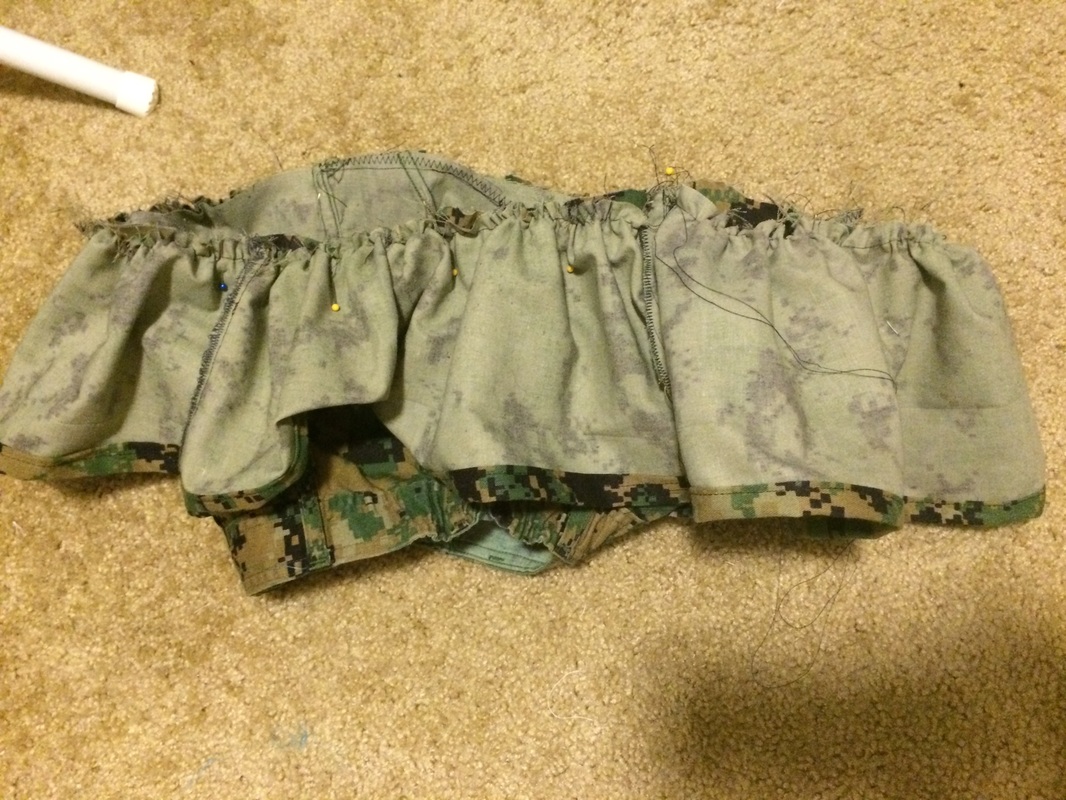
Baste (sew with your longest stitch) two rows of stitches on the other side that isn’t hemmed. Make sure to leave long tails at the beginning and end of the stitching. Do NOT back stitch!
Set aside for later
Baste (sew with your longest stitch) two rows of stitches on the other side that isn’t hemmed. Make sure to leave long tails at the beginning and end of the stitching. Do NOT back stitch!
Set aside for later
Step 8.
Get the top part of the pants you cut. By cutting above the crotch you should have also cut some of the pockets off. We are going to sew the pockets closed. If you own a serger you can serge the bottoms of the pockets to re close them. If you don’t have a serger do a straight stitch and then a zig zag stitch to close the pockets (and make them useable again. Yay!).
Get the top part of the pants you cut. By cutting above the crotch you should have also cut some of the pockets off. We are going to sew the pockets closed. If you own a serger you can serge the bottoms of the pockets to re close them. If you don’t have a serger do a straight stitch and then a zig zag stitch to close the pockets (and make them useable again. Yay!).

Step 9.
Take the circle fabric from step 7 and turn it inside out so you can put right sides of the cami pants top and circle fabric together.
Take the circle fabric from step 7 and turn it inside out so you can put right sides of the cami pants top and circle fabric together.
Step 10.
Match up side seams and pin together.
Match up side seams and pin together.
Step 11.
Pull threads of gathered basting stiches to make the hemmed part ruffle become the same size as the top of the pants.
Pull threads of gathered basting stiches to make the hemmed part ruffle become the same size as the top of the pants.

Step 12.
Pin in place
Pin in place
Step 13.
Sew with a .5 seam allowance around the entire edge of the skirt. Make sure not to sew the pockets to the skirt. They can float freely on their own.
Sew with a .5 seam allowance around the entire edge of the skirt. Make sure not to sew the pockets to the skirt. They can float freely on their own.
Step 14.
Zig zag or serge around the same seam you just sewed.
Zig zag or serge around the same seam you just sewed.
Step 15.
Iron the hem up. Top stitch all of the way around.
Iron the hem up. Top stitch all of the way around.
Step 16.
You’re done! Wear your new skirt with pride!
You’re done! Wear your new skirt with pride!

 RSS Feed